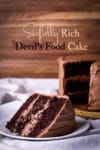
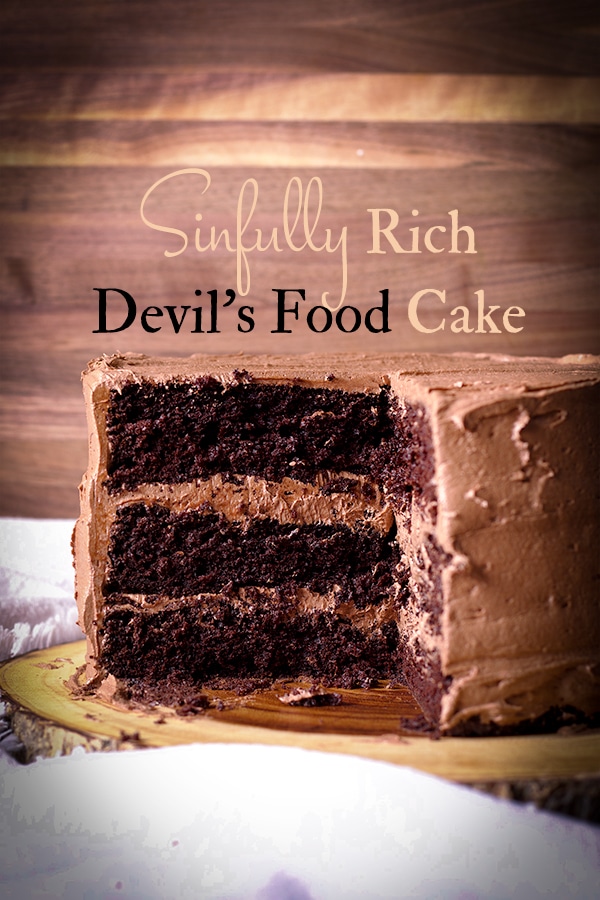
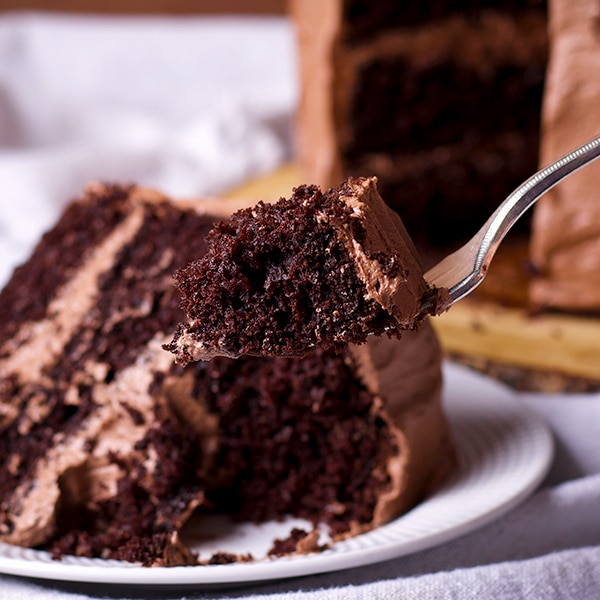
This sinfully dark chocolate Devil's Food Cake is so obscenely rich and fudgy that it elevates chocolate cake to a whole new level of decadence.
Being bad never felt so good.
This is the Only Chocolate Cake Recipe You'll Ever Need
- It's so rich and fudgy that it blurs the line between chocolate cake and brownies.
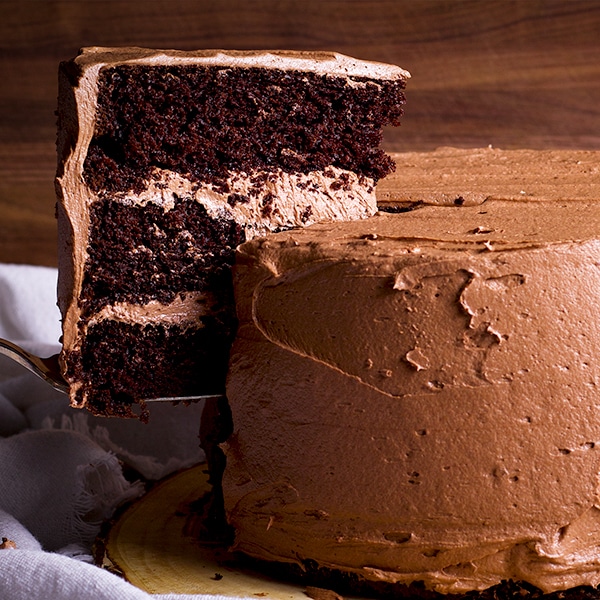
- It produces layers of cake that bake up perfectly flat and stackable.
- The velvety crumb practically melts in your mouth, and yet...
- It's sturdy enough to stack up to every imaginable filling and frosting.
In other words, this chocolate cake is wicked good and earned the right to be called Devil's Food.
How to Make the Best Devil's Food Cake
#1. Use Dutch Process Cocoa Powder instead of Natural Cocoa Powder.
This is an important difference. Chocolate is naturally acidic, and acidic reactions are a super important thing to understand in baking.
Acid enhances flavors, influences how a cake rises, and affects the cake's consistency. For the most part, you want some acid in your cake. Just not too much.
In chocolate cakes that call for acidic ingredients (like the unsweetened chocolate, baking powder, espresso, brown sugar, and sour cream in this recipe) Dutch processed works best because, unlike natural cocoa powder, it's gone through a process to neutralize its acidity.
In this recipe, using Dutch-processed cocoa powder means we can add enough to get a super rich chocolate flavor without overdoing the amount of acid in the batter.
If your local supermarket is anything like mine, the selection of cocoa powder is super limited. Mine usually carries one brand of Dutch process cocoa powder - Hershey's Special Dark. This brand works perfectly well. You can also find other options online. Besides Hershey's Dark, the brand I use is The Cocoa Trader.
#2. Use Room Temperature Ingredients
In this Devil's Food Cake recipe, as in most cake recipes, you'll notice the words "at room temperature" after the butter, eggs, and sour cream. This is important. Please don't ignore it. At room temperature, eggs and dairy form an emulsion that traps air.
This is a good thing because all that trapped air expands in the oven, producing a fluffy consistency. Without this process, your cake won't rise well and you might end up with something more like a hockey puck than a cake.
Also, room temperature ingredients blend together better. For example, have you ever tried to beat cold butter with sugar? It doesn't really work.
The sugar won't fully incorporate into the butter until the butter is at room temperature. Using room temperature ingredients creates a smooth, fully blended batter that will result in a uniform texture and even baking.
If you manage to plan ahead a bit, simply set the butter, eggs, and sour cream out on the counter a couple of hours before you plan to make your cake. I rarely succeed in this level of pre-planning and so have come up with a few tricks for brining eggs and dairy to room temperature quickly.

#3. Use Butter for Flavor and Oil for Lightness and Moisture
Oil is wonderful in cakes. When compared to butter, cakes baked with oil are loftier, have a more even crumb and stay moist and fresh tasting much longer. Case in point - Olive Oil Cake is moist, flavorful, tender and delicious, and keeps that fresh-from-the-oven texture for days after baking.
The same is true for my favorite Spice Cake and Carrot Cake recipes, both of which are oil based cakes and decadently moist and flavorful.
Oil is particularly great in chocolate cakes because chocolate tends to dry out a cake. And this cake has a LOT of chocolate.
So, why doesn't this recipe use ALL oil instead of a combination of butter and oil? Flavor. Butter adds flavor.
For this recipe, I found that 5 tablespoons of butter and 5 tablespoons of oil was the perfect balance for maximum buttery flavor AND a moist, tender crumb.
#4. Use Two Whole Eggs and Four Egg Yolks
Eggs create essential structure and stability in cakes. Egg whites are fantastic at trapping air, which helps cakes rise in the oven, giving them a light texture. Yolks are fantastic at binding liquids and fats together, creating an emulsion that results in a super smooth homogenous batter.
Yolks also have a high fat content, contributing to this cake's rich flavor and velvety texture.
In this Devil's Food Cake Recipe, the combination of a total of 6 egg yolks and 2 egg whites achieves the perfect balance of a rich, fudgy consistency that isn't overly dense.
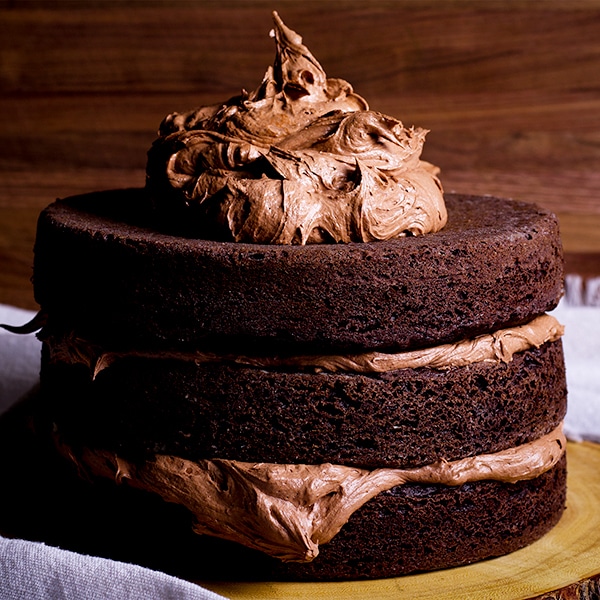
# 5. How to bake flat cake layers that are easy to stack
Sure, you can level off the top of a cake that's dome shaped. But, wouldn't you rather not have to?
If you follow the instructions to use room temperature ingredients in this recipe so that you have a homogenous, smooth batter, you're well on your way to baking well-risen flat cake layers. Baking the layers at 325 degrees will get you the rest of the way there.
Baking at a lower temperature slows down the cake's "spring" - how quickly it rises in the oven. This prevents a dome from forming on the top of the cake layers. If only every problem in life had such a simple solution.
Important note about baking temperature: Most of us are baking with ovens that are not 100% accurate when it comes to temperature. It's totally worth it to invest in an oven thermometer that will tell you what temperature your oven actually is.
What Kind of Frosting Goes Best with Devil's Food Cake?
These 5 buttercream recipes are my favorite kinds of frosting to use with Devil's Food Cake:
- White Chocolate Ganache Buttercream: tastes like the inside of a really good chocolate truffle.
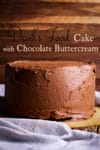
- Quick Chocolate Buttercream: because chocolate on chocolate is always a good idea
- Classic American Buttercream: for when chocolate on chocolate is more than you can deal with
- Italian Meringue Buttercream: because it goes with EVERYTHING
- Cream Cheese Buttercream: a classic, creamy choice with just the right amount of tang
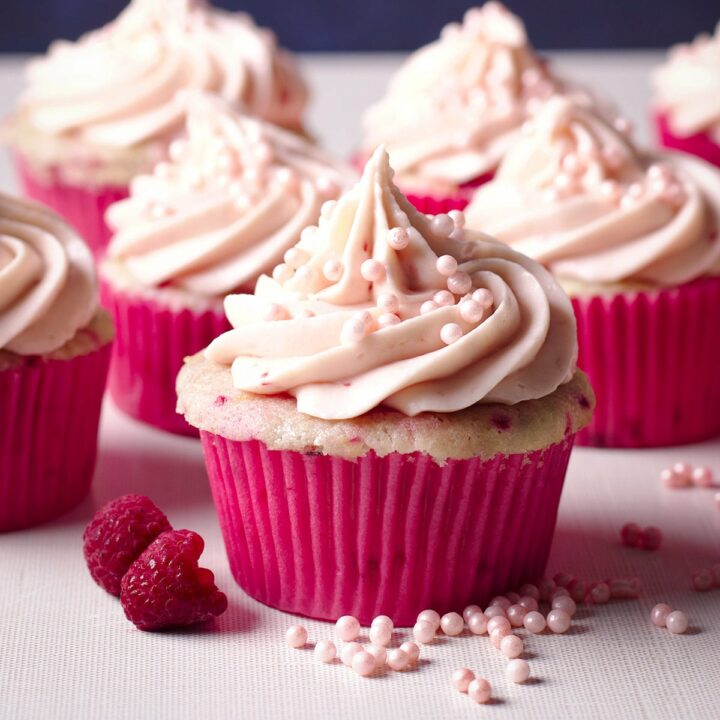
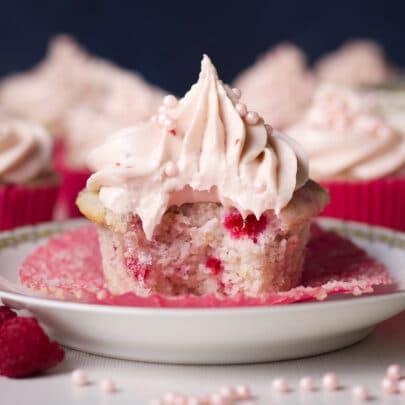
- Raspberry Cream Cheese Frosting: for that classic chocolate raspberry combo.


Cakes that begin with this Devil's Food Recipe:
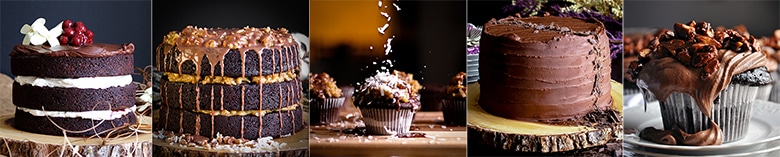
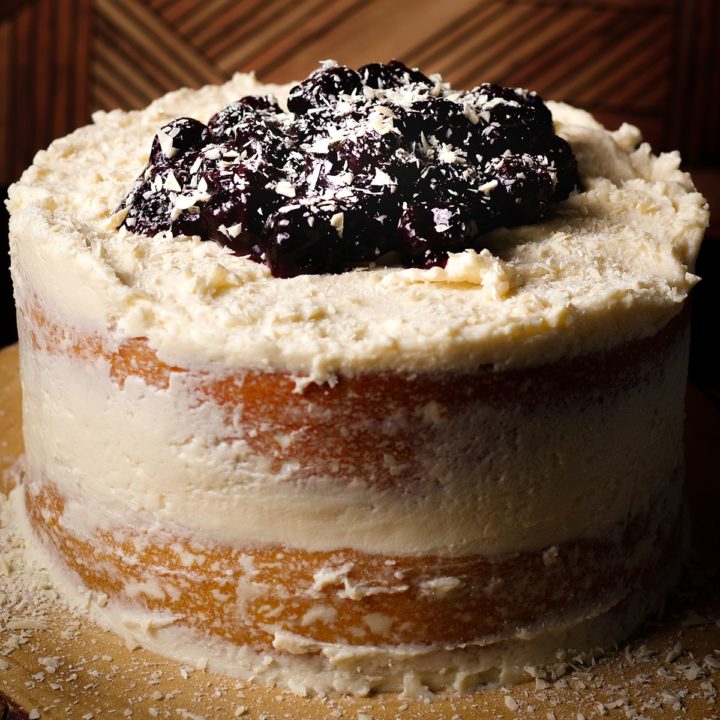
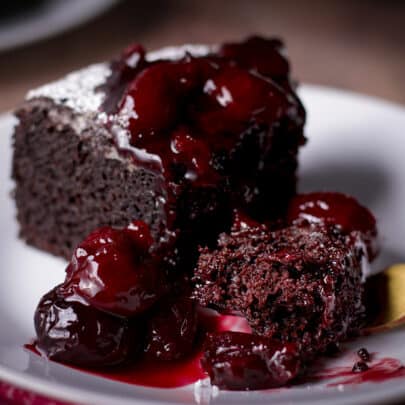
- Black Forest Cake. Every bite of this Black Forest Cake is loaded with creamy chocolate and juicy cherries. Three deep, dark, rich and chocolaty Devil's Food cakes are doused with cherry liquor, layered with sweetened vanilla whipped cream and tart Morello cherries, and topped with dark chocolate ganache.
- German Chocolate Cake. This German Chocolate Cake is all about rich chocolate fudge cake, warm caramel filling with toasted pecans and sweet coconut, and milk chocolate ganache.
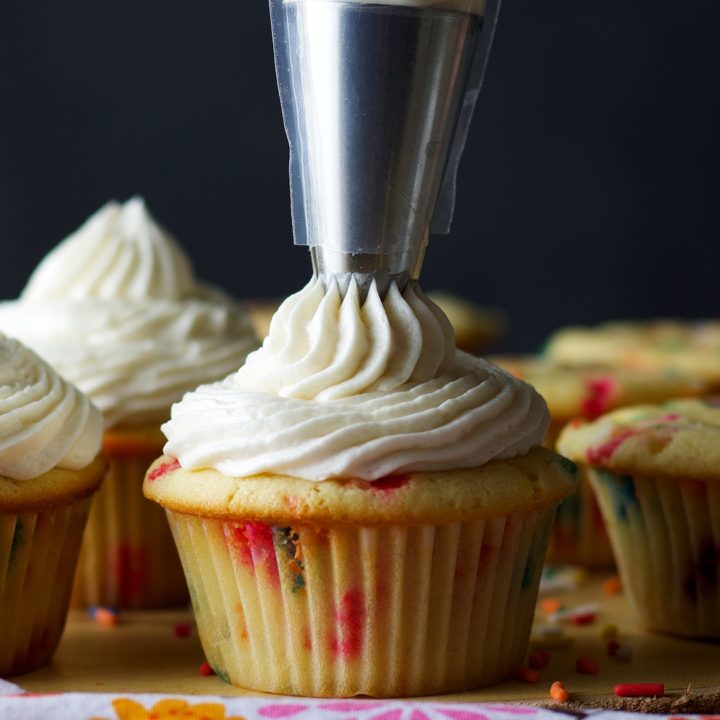
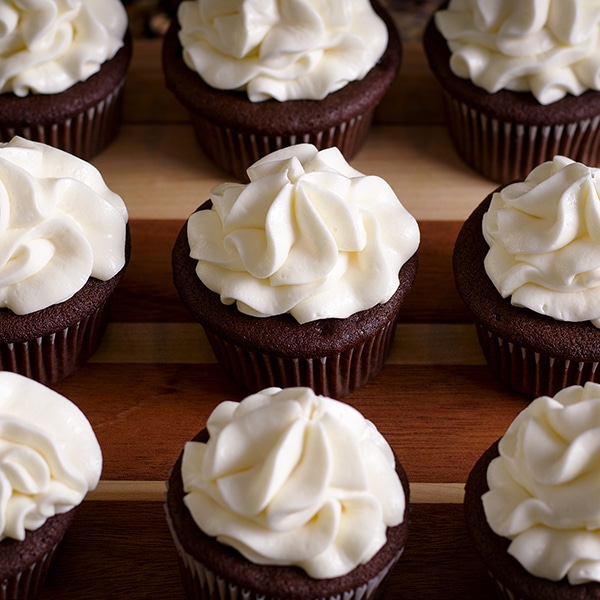
- German Chocolate Cupcakes. Dark Chocolate Devil’s Food Cupcakes topped with a generous spoonful of rich, caramel German Chocolate topping packed with toasted pecans and coconut, and covered in a drizzle of chocolate ganache.
- Blackout Chocolate Cake. If there's a way to pack more chocolate into this cake, I don't know what it is. Three layers of rich Devil's Food Cake are layered with Chocolate Pastry Cream and then covered in a thick layer of chocolate ganache. It's a chocolate lover's wet dream. Yes. I just said that.
- Double Chocolate Cupcakes with Amaretto Pastry Cream and Almond Pralines. These chocolate cupcakes are filled with Amaretto Pastry Cream, frosted with whipped chocolate ganache and topped with almond pralines. Because if you’re going to eat a cupcake, it should be an amazing cupcake.
Devil's Food Cake is a Building Block Recipe
Building block recipes are tried-and-true recipes that I consider foundational to great home baking. They are the kind of recipes I come back to over and over again, sometimes baking them as is, but often using them as a jumping off point to create something new. > Scroll through all Building Block recipes.
If you give this recipe a try, let me know! Leave a comment, rate it, or take a picture and tag it #ofbatteranddough on Instagram.
Happy baking!
📖 Recipe

Devil's Food Cake
This sinfully dark chocolate Devil's Food Cake is so obscenely rich and fudgy that it elevates chocolate cake to a whole new level of decadence. Being bad never felt so good.
Ingredients
- ½ cup dutch process cocoa powder
- 4 ounces unsweetened chocolate, very finely chopped
- 1 ½ teaspoon instant espresso powder
- 1 cup boiling water
- 1 ½ cups all-purpose flour
- ½ teaspoon baking soda
- ¾ teaspoon baking powder
- ¾ teaspoon table salt (1 ¼ teaspoon kosher salt)
- 5 tablespoon salted butter
- 5 tablespoon vegetable or canola oil
- 1 ½ cups light brown sugar
- 2 large eggs
- 4 large egg yolks
- 2 teaspoon pure vanilla extract
- ½ cup sour cream (full fat)
Instructions
- If baking a layer cake: Preheat the oven to 325 degrees and grease and flour two or three 8 or 9-inch round cake pans, lining the bottoms with parchment paper. (Here's how to grease and flour pans and line them with parchment paper.) If baking cupcakes, heat oven to 400 degrees, lightly spray the top of two cupcake pans with non-stick spray, and line the cavities with paper liners.
- Add the cocoa powder, finely chopped unsweetened chocolate, and espresso powder to a bowl. Pour in the boiling water and stir until smooth. Set aside.
- In a separate bowl, add the flour, baking soda, baking powder, and salt. Whisk to combine and set aside.
- Using an electric mixer, beat the butter, oil, and light brown sugar, stopping to scrape down the sides of the bowl a time or two, until it looks fluffy and lightened in color, at least 5-6 minutes.
- Add the 2 whole eggs one at a time, beating until each is fully incorporated before adding the next.
- Scrape down the sides of the bowl and add two of the egg yolks. Beat until the yolks are fully incorporated into the batter. Scrape down the sides of the bowl and add the remaining two egg yolks. Beat until fully incorporated.
- Add the sour cream and vanilla and beat until the batter is smooth and homogenous, stopping to scrape down the sides of the bowl as necessary, about 30 seconds.
- Add the chocolate and flour mixtures in alternating additions: ⅓ of the flour, ½ of the chocolate, ⅓ of the flour, ½ of the chocolate, ⅓ of the flour. After each addition, beat on low speed just long enough to barely incorporate. Be careful to not over beat. Give the batter one final stir with a spatula to fully incorporate all the ingredients. Divide the batter between the cake pans - OR distribute among paper lined cupcake pans.
- Bake round cake layers for 33-43 minutes, until a toothpick inserted in the center of one of the cakes comes out without any visible cake batter. (Three layers will take close to 33 minutes. Two layers will take close to 43 minutes.) Bake cupcakes for 5 minutes then reduce the oven temperature to 350 degrees (keep the oven door closed) and bake for an additional 15 minutes, until a toothpick inserted in the center of one of the cupcakes comes out without any visible cake batter.
- Remove the cakes or cupcakes from the oven. Allow the cakes to rest in their pans for 5 minutes, then gently flip the cakes out onto the wire racks and allow to cool completely. Allow the cupcakes to cool in the pan until sturdy enough to lift out with your fingers.
Notes
Favorite Frosting Recipes for Devil's Food Cake:
Recommended Products
As an Amazon Associate and member of other affiliate programs, I earn from qualifying purchases.


Nutrition Information:
Yield: 16 Serving Size: 1 slice of cake, unfrostedAmount Per Serving: Calories: 250Total Fat: 12gSaturated Fat: 6gTrans Fat: 0gUnsaturated Fat: 5gCholesterol: 95mgSodium: 349mgCarbohydrates: 30gFiber: 2gSugar: 17gProtein: 6g
doris says
this cake looks really good can this be made in a 9x13 pan or I have to half the recipe and I would leave out the coffee cuz I don't like anything with coffee in it.
Rebecca Blackwell says
Hi Doris! Yes - you can bake this cake in a 9x13 pan. I would go ahead and make the full recipe. If you have a bit of extra batter, use it to make a couple of cupcakes if you like. And you can absolutely leave out the coffee. You really can't taste it in there, it just supports the flavor of the chocolate. But, if you are at all concerned that you might be able to detect it, leave it out with no worries. Please let me know if you have any other questions! And I'd love to hear what you think of this cake after you make it! xo
KJ says
Hi, I first made this recipe years ago and it is one of our favorites. I see that you've adjusted several of the ingredients (less water, more egg yolks, etc.). How does this compare with your earlier recipe?
Rebecca Blackwell says
Hi KJ! I'm so happy to hear that you and your family like this recipe! One of the best things about publishing recipes online is that they can be tweaked based on feedback from other bakers all across the world. Occasionally, it makes sense to make minor adjustments to a recipe based on that feedback, in an effort to ensure that bakers everywhere (in different altitudes, climates, etc.) will have success. That's what's happened with this recipe. The tweaks are usually minor and I doubt you'll notice a difference between the original recipe and the recipe as it is now. But, please do let me know if you ever run into any problems or have any suggestions for a recipe! I do my best to listen to the experience of other bakers and make improvements and clarifications whenever necessary. xo
Elle says
Hi there,
This recipe looks amazing. I was just wondering, do you think replacing the sour cream with buttermilk will work?
Rebecca Blackwell says
Hi Elle! Yes! That will work! I do suggest using whole milk buttermilk, if you can, rather than the kind made from low-fat milk. I'd also use 1 tablespoon less; measure 1/2 cup buttermilk and remove 1 tablespoon. This will account for the fact that buttermilk has a slightly higher water content than sour cream. Please let me know if you have any other questions! And I'd love to hear how your Devil's Food Cake comes out for you! xo
Natalie says
Can you swap out a gluten free 1:1 flour in place of the AP flour listed? I make your gluten free vanilla cake but want to mix it up with chocolate for a change.
Rebecca Blackwell says
Hi Natalie! I think swapping out the flour for GF flour will work well, but I have to tell you that I've never made this cake with GF flour so I can't say for sure. I'd suggest making a half batch to test it and adding some Xanthan Gum - probably 2 teaspoons per recipe. So, 1 teaspoon if you're making a half batch. I hope that helps! Please let me know if you have any other questions. And I would love to hear how this works out for you! xo
Lona says
That is way too much xanthan gum.
Lona says
Maybe 1/4 of a teaspoon. Hope that helps.
Meghan says
The best chocolate cake I’ve ever made or had. And I’ve made and had a lot! It’s so moist and rich. I used it as the layers for a German chocolate cake and oh. My. Goodness. I could have eaten the entire thing myself!
Rebecca Blackwell says
Hi Meghan! I am so happy to hear that you liked this recipe so much! This is one of my favorite recipes because I think it tastes perfectly decadent all on its own, but can also be used to make an infinite number of other kinds of chocolate cake - like German Chocolate! Thank you so much for taking the time to leave a comment for me! I appreciate it so very much! xo
Valerie says
The absolute BEST chocolate cake I have ever made! I true splurge worthy dessert. And don’t miss out covering it with chocolate buttercream frosting. I will make this again and again:)
Rebecca Blackwell says
Hi Valerie! I am so happy to hear that you liked this recipe! This is my favorite chocolate cake... If I could, I'd eat it every day.m 🙂 Thank you so much for taking the time to leave a comment for me! I appreciate it so much! xo
claire says
hi! this recipe looks wonderful!! could i cake it into mini cupcakes? if so how long and what temperature should i bake them at?
claire says
hi! this recipe looks amazing!! could i make it into mini cupcakes? if so how long and what temperature should i bake them? thanks so much!!
Rebecca Blackwell says
Hi Claire! I haven't tested this batter in a mini cupcake pan yet, so I can't say for sure if it would work well or not. BUT, I do have a mini chocolate cupcake recipe that I love: Chocolate Peppermint Cupcakes. The recipe doesn't include any peppermint in the cupcakes themselves; it's just in the frosting.
The tricky thing about baking mini cupcakes is how well the batter releases from the wrapper. When you have a whole cupcake, if some sticks to the batter it's no big deal. With mini cupcakes, if some sticks to the wrapper, you loose half the cupcake. 🙂 This Devil's Food cake is super moist, so having not tested it, that would be my concern. If you decide to go ahead and try it, please let me know how it goes! Otherwise, I'd stick to the recipe I just mentioned, which I know for sure works great as mini chocolate cupcakes.
I hope that helps! Please let me know if you have any other questions! xo
Carley N says
Hello! I am curious if you think this would turn out well as a bundt cake. Having read previous comments, I'm assuming it would not but just thought I'd ask. Happy New Year!
Rebecca Blackwell says
Hi Carley! I haven't tested this recipe in a bundt pan, so I can't say for sure. I'll do that soon and add a note about temperature and times in the recipe. In the mean time, this is one of my favorite chocolate cake recipes and it works beautifully in a bundt pan. I've made it more times than I can count and it's always a hit, with or without the filling, frosting, and pralines. It's very similar to Devil's Food cake - super moist and very chocolaty. I hope that helps! Please let me know if you have any other questions! xo
Emily says
Hi. I am excited to try this recipe. But I don't drink coffee--like ever. Can I skip that ingredient or replace it with something else?
Rebecca Blackwell says
Hi Emily! You can just leave the espresso out entirely if you like and the flavor will still be rich and chocolatey. Espresso, when used in small amounts, has a way of intensifying the flavor of chocolate. But there's plenty of chocolate in this recipe! Leaving it out is perfectly fine. Please let me know if you have any other questions! And, I'd love to hear what you think of this cake after you make it! xo
Andrea Kirby says
Hi Rebecca! I had the same question as Nicole about using 11x15 pan. I am hoping this recipe for a 3-tier cake is enough batter for the large sheet cake pan. I'll bake it at 325 as suggested. Do you think the baking time will be the same as with the 3 cake rounds or should I alter the time? Thanks!
Rebecca Blackwell says
Hi Andrea! I'm sure the bake time will be different, but am not sure by how much. Just keep an eye on it. I would peak at it after 30 minutes and then check on it every 5 minutes after that. Just be careful to not fully open the oven until the center looks "set". The cake is done when the center looks set and the sides of the cake are just barely pulling away from the sides of the pan. When you see that, stick a toothpick in the center and if it comes out without any trace of raw batter, the cake is done. Please let me know if you have any other questions! And, I'd love to know what you think of this cake after you make it! xo
Abigail Nyasha says
I tried this recipe last night. It's velvety, and moist, I am just having a challenge with the salt... seeing that noone else is complaining about the saltiness, I think my salted butter is too salty or my salt is too salty 😅🤣
Will try it again without salt next time. Otherwise, it's a beautiful recipe.
Rebecca Blackwell says
Hi Abigail! So much of baking (and cooking) is about finding the right balance of ingredients for your pallet, isn't it? This is even more of a challenge when all of us are working with various brands of ingredients that might have slightly different properties. Even small differences can make a big impact in baking. So I appreciate your willingness to make adjustments and try it again rather than just giving up on the recipe entirely. 🙂 Please let me know if adjusting the amount of salt makes a difference for you! And, thank you so much for taking the time to leave a comment! xo
Lilly says
Should I bake the layers separately or is it okay to bake it as one and cut it afterwards?
Rebecca Blackwell says
Hi Lilly! I would suggest baking the layers separately. This cake is quite fudgy and moist. If you baked it as one layer, I'd be concerned about the structure not being strong enough to hold up the weight of the cake and collapsing in the center. The other issue you might have is cutting the layers - because it's so fudgy, slicing the layers could get tricky. Please let me know if you have any other questions and I'd love to know what you think of this cake after you make it! xo
Artemis says
Hello... I can't wait to bake this cake for an upcoming birthday cake with Italian meringue oreo buttercream . Just three questions... First, do you use air to your oven to bake these cakes? Second, how many days in advance can I bake them? And last, if I bake the cakes earlier, do you think that I should use some simple syrup on them? Thank you very much 😊
Artemis says
One more question. I can't buy as soon as I need dutch cocoa powder. How can I substitute it? I read somewhere that I can add 1/8 teaspoon of baking soda for every 3 tablespoons of cocoa powder used. Do you think is that right? Thank you again!!!
Rebecca Blackwell says
Hi there! 1/8 tsp of baking soda for every 3 tablespoons of cocoa powder is pretty standard. However, for this cake I would suggest using a bit less baking soda. I'm concerned about adding too much leavening to this cake, which could cause it to rise too high while baking and then sink in the middle. I think you could substitute up to half of the dutch process cocoa powder with regular cocoa powder without making any other changes. If you want to substitute all of the dutch process cocoa powder with regular cocoa powder in this recipe, I'd suggest increasing the amount of baking soda from 1/2 tsp to 3/4 tsp. I hope that helps! Please let me know if you have any other questions! xo
Rebecca Blackwell says
Italian Meringue Oreo Buttercream sounds soooooooo good! I can't believe I've never tried adding Oreos to IMB. Now, I'm dying to try it! I do have a convection oven, which circulates air in the oven as things bake. However, I have baked this cake in ovens without the convection feature. In both cases, set the oven to 325 degrees. You can bake this cake up to 48 hours in advance, keeping the layers well wrapped at room temperature. However, it will be the most moist and tender if you bake and serve it within 24 hours. If you want to bake the cake longer than a couple of days in advance, I'd suggest freezing it. Wrap the layers of cake in a couple layers of plastic wrap and then one layer of aluminum foil - OR, put them in freezer zip-top bags. They will keep in the freezer for up to 3 months. If you are at all concerned with the cakes being dry, brushing them with simple syrup is a great solution. I've found that a bit of simple syrup never hurts, even if the cakes didn't really "need" it.
Please let me know if you have any other questions! And, I'd love to know what you think of this cake after you bake it! xo
Kimmy K. says
Have you tried adding warm milk to cacao/espresso mixture? I’m tempted to try it because I have extra milk on hand but I’m not sure if using milk instead of water will dry out the cake.
Rebecca Blackwell says
Hi there! Great question. I think using milk instead of water will be fine. The only reason I say I "think" it will work is because using milk instead of water will add additional fat and protein to the batter. I doubt that little bit of extra will mess up the balance of the ingredients... but, it's possible. Using milk instead of water won't dry out the batter. If anything, it will make it even more moist. If you try it, will you let me know how it works out? I'd bet there are other readers who might be interested in that option. xo
Sagana says
This is the best chocolate cake I’ve ever eaten in my whole life. It was a super duper hit in my family. Thankyou for the recipe!
Rebecca Blackwell says
I am so happy to hear that Sagana! Thank you so much for taking the time to leave a comment for me! xo
Magdalena says
This cake looks amazing! I would like to give it a try but have only one cake pan. Should I leave the remaining batter in the fridge while baking first layer?
Rebecca Blackwell says
Hi Magdalena! Yes - leaving the remaining batter in the refrigerator should be fine. You could also cut the recipe in half and bake this as a two layer cake - IF your cake pan is deep enough. Mix up half the batter, and then mix the other half while the first layer is in the oven. Just be careful to not fill the pan more than halfway full with batter. Please let me know if you have any more questions! And, I'd love to hear what you think of this cake after you make it! xo
Cindy says
Does the cake with the chocolate buttercream frosting need to be refrigerated? I’m serving it tomorrow for a birthday lunch. Thank you Cindy
Rebecca Blackwell says
Hi Cindy! It's not necessary to refrigerate this cake; however, if you're keeping a frosted cake overnight, refrigerating it will keep the frosting fresh for longer. The frosted cake will be fine sitting out at room temperature for several hours during the day. Please let me know if you have any other questions! And I hope the birthday lunch is fabulous! xo
Melanie says
This cake is absolutely decadent! I really love all your detailed explanations, the cake turned out perfect. Thank you!
Chandice Probst says
Yum! This cake is pure decadence! Thank you for such a great recipe! This has become my go-to chocolate cake for every occasion!
Rebecca Blackwell says
I am so happy to hear that Chandice! Thank you so much for taking the time to leave a comment for me! I really appreciate it. xo
Lilian says
Hii the recipe looks amazing, I'm looking to get a fluffy velvety texture, in this recipe can I substitute the 1/2C sour cream for 1/2C whipped cream like in the red velvet cake?
Rebecca Blackwell says
Hi Lilian! I wouldn't suggest substituting cream for the sour cream because the batter really needs the acidity that the sour cream provides. What you could try is folding some whipped cream into the batter right before baking, just like with the Red Velvet recipe. I'd start with just 1/3 of a cup... And, just so you know, I haven't tried this myself so I can't guarantee that it will work. What I can tell you is that folding in a bit of whipped cream right before baking is a technique that works well on many recipes. This might be one of them, I just don't want to give the impression that I've done it myself. 🙂 If you try it, will you let me know how it worked? xo
Lilian Garcia says
Hi rebecca! I did the thing with the heavy cream and it didn't work out, it rised a lot in the oven, buuuut after cooling it came out with a gummy texture really weird, but I also did the original recipe and it is amazing!!! The velvety texture it's fantastic. I really appreciate all your explanation of the ingredients and the baking techniques it has helped me a lot.
Rebecca Blackwell says
Well, now we know. 🙂 Kudos to you for being willing to experiment and try it! You just never know until you try. I am so happy that the recipe itself worked out well for you. This cake is a great representation of trial and error in my kitchen. I don't even know how many versions I went through before getting the kind of cake I wanted. We had chocolate cake coming out of our ears for a while. 😂 Thank you so much for taking the time to update me on the whipped cream experiment and for letting me know you like this recipe. I truly appreciate it! xo
Heidy L. McCallum says
This devil's food cake looks outstanding. I saw that giant slice of cake and was immediately planning my list for the market. That recipe just screams delish!
Rebecca Blackwell says
Hi Heidy! Thanks so much for taking the time to leave a comment for me! I can't wait to hear what you think of this cake! xo
Veena Azmanov says
This cake is soooooo delicious. It has so much flavor and SO much chocolate. It's definitely become my new go-to chocolate cake recipe. Thank you!
Rebecca Blackwell says
I am so happy to hear that you liked this recipe Veena! Thank you so much for taking the time to leave a comment for me! xo
GUNJAN C Dudani says
This cake looks divine. I wish I could dig it through your images. its scrumptious and irresistible.
Rebecca Blackwell says
Thank you so much! xo
Kushigalu says
This cake looks so moist and amazingly delicious. Can't wait to try this out. YUMMY!
Rebecca Blackwell says
Thank you so much! xo
Myra says
Just made this as part of February challenge and the cake seems moist but my layers aren't very high. I tested my baking powder and it was good. Not sure what I did wrong.
Rebecca Blackwell says
Hi Myra! First of all, thank you for participating in the Bake Club!!! About the cake not rising - this is a very rich, chocolaty cake. The layers should rise, but they won't be super tall. How did the cake taste? If it tasted overly dense, and you know your baking powder is good, the next thing I would check is the accuracy of your oven temperature. Most of our ovens are not 100% accurate. Purchasing a simple (inexpensive) oven thermometer can tell you if your oven temperature is off at all and by how much. Another thing that can cause a cake to not rise well - In step #4, it's important to beat the butter, oil, and sugar for a solid 4 to 5 minutes. This beats air into the mixture, which gets trapped in the fat molecules and helps the cake rise while it bakes. Do you suppose the problem might be due to either of these causes? Please let me know if you have any other questions! xo
Bonkam says
Please sent more amount of this cake recipe
Lisa Doherty says
just looking at your wonderful devils food cake.
will this recipe make a 12 x 18 sheet cake or should I make a recipe and 1/2?
Rebecca Blackwell says
Hi Lisa! One recipe will be plenty for a 12 x 18 sheet cake. In fact, you'll most likely have some batter leftover. I'd suggest baking a few cupcakes with the extra batter, which of course, become the baker's treat! 🙂 Please let me know if you have any more questions, and I'd love to know what you think of this cake after you bake it. xo
Nicole says
Hi - I just baked this in an 11x15 cake pan and my cake didn't rise at all! This was a test run for a birthday cake. I feel I should have doubles the recipe. I feel that I followed your directions pretty well (I am not a beginner baker, but semi beginner at decorating sheet cakes). Do you have any thoughts as to why it didn't rise? Also, I do love how nicely it came out of the pan, but I would like the cake a bit sweeter. Would more sugar alter the cake in any other ways?
Thanks so much,
Nicole
Rebecca Blackwell says
Thanks so much for your comment Nicole. Having just made this cake for about the hundredth time myself, I'm bummed that it didn't come out for you. There are a number of things that can cause a cake to not rise... if you're willing to troubleshoot with me a bit, I'm certain we can figure it out. I just sent you a direct email with some ideas for where to start figuring out the problem. xoxo
Linda Cox says
Do you have recommendations for higher altitude baking? 5,000. Thank you.
Rebecca Blackwell says
Hi Linda! I actually live in Denver at around 5200 feet and these cakes came out perfectly for me every time I baked a batch. Which, over the last two weeks has been a lot. 🙂 So, if you're at high altitude, you should be golden! If you bake this recipe, will you let me know how the cakes come out for you? Happy baking! xo
Linda Cox says
Thank you so much!! I can’t wait to try the cake. I’ll let you know how it turns out. I appreciate your creativity and help. Linda