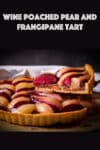
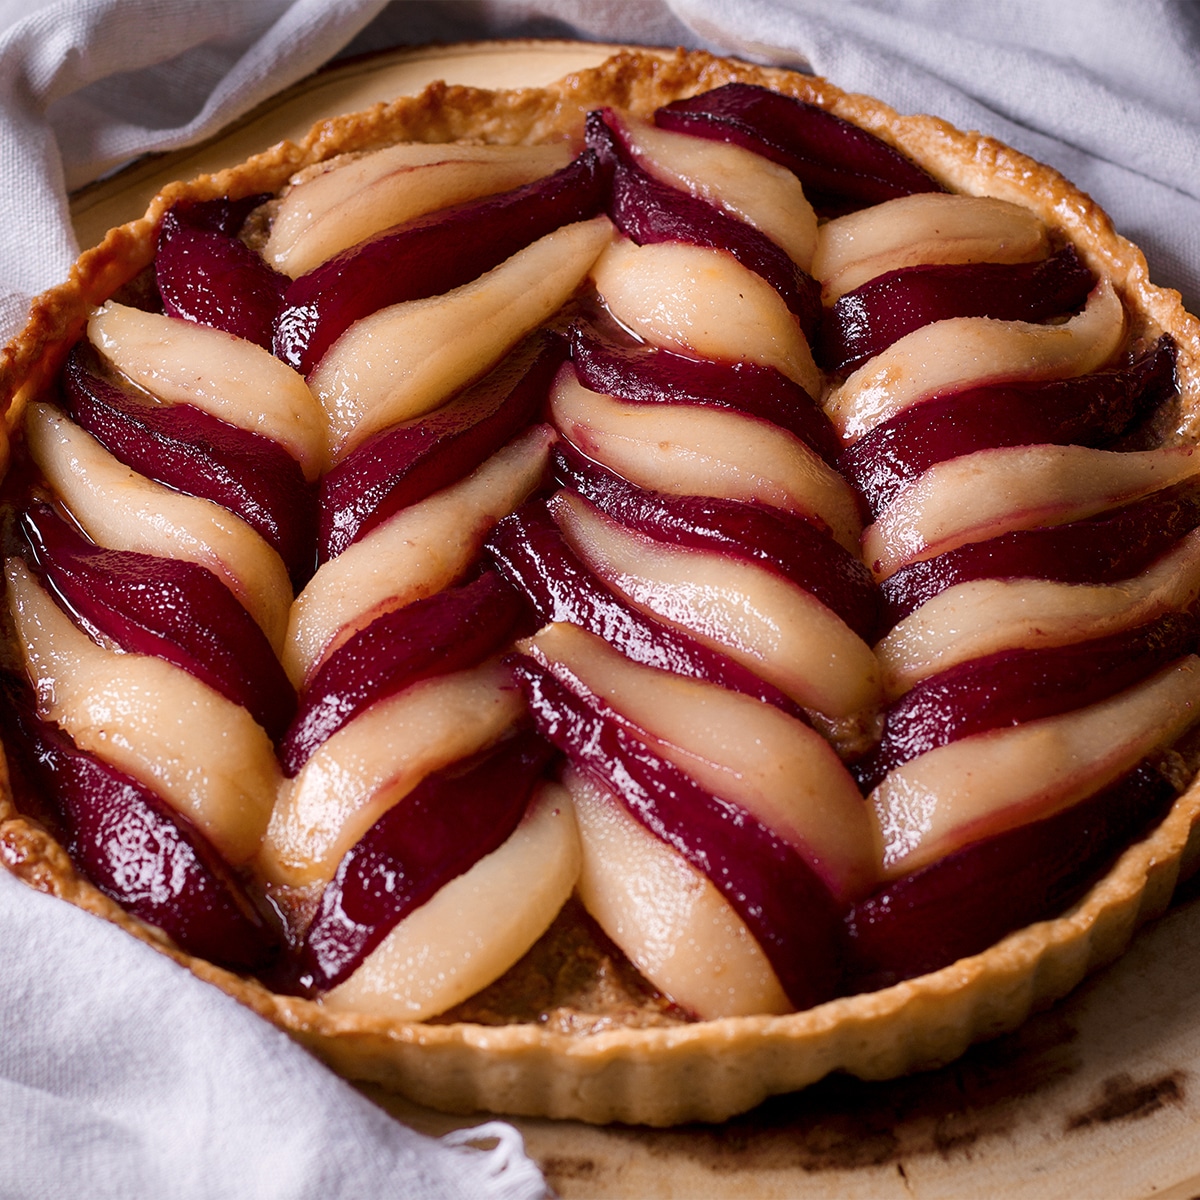
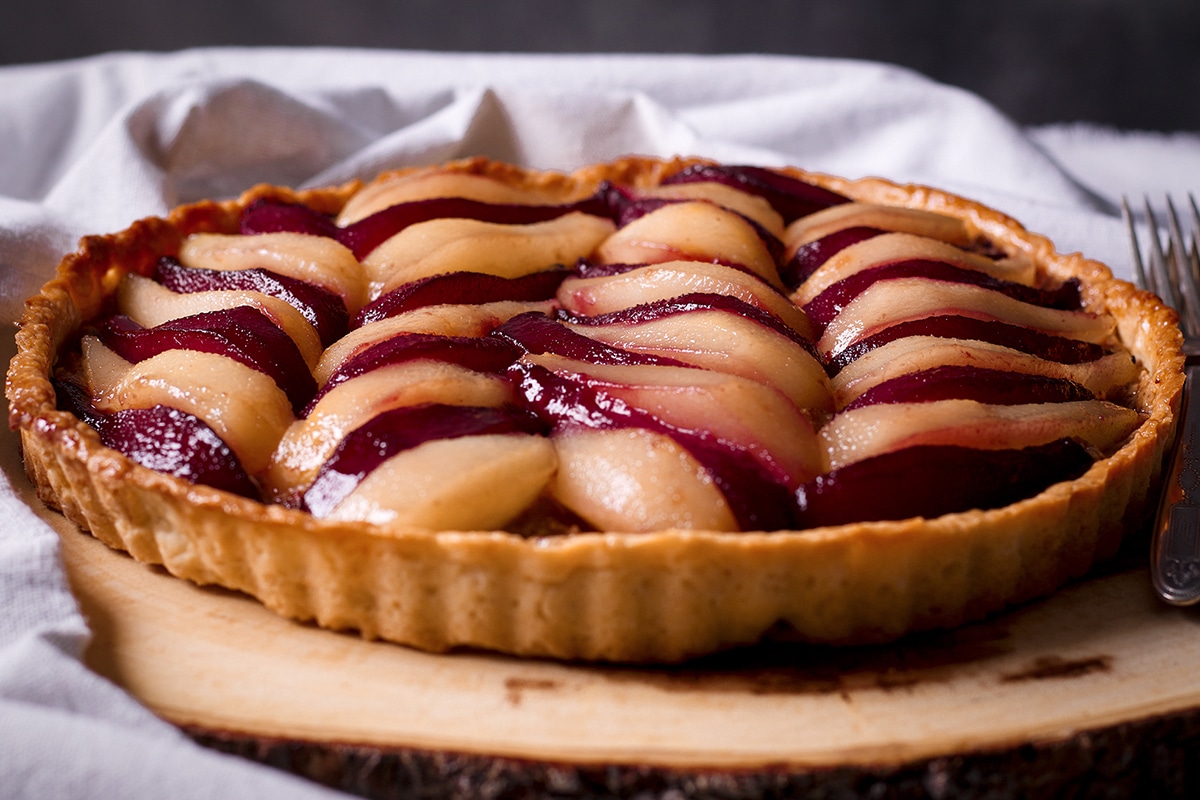
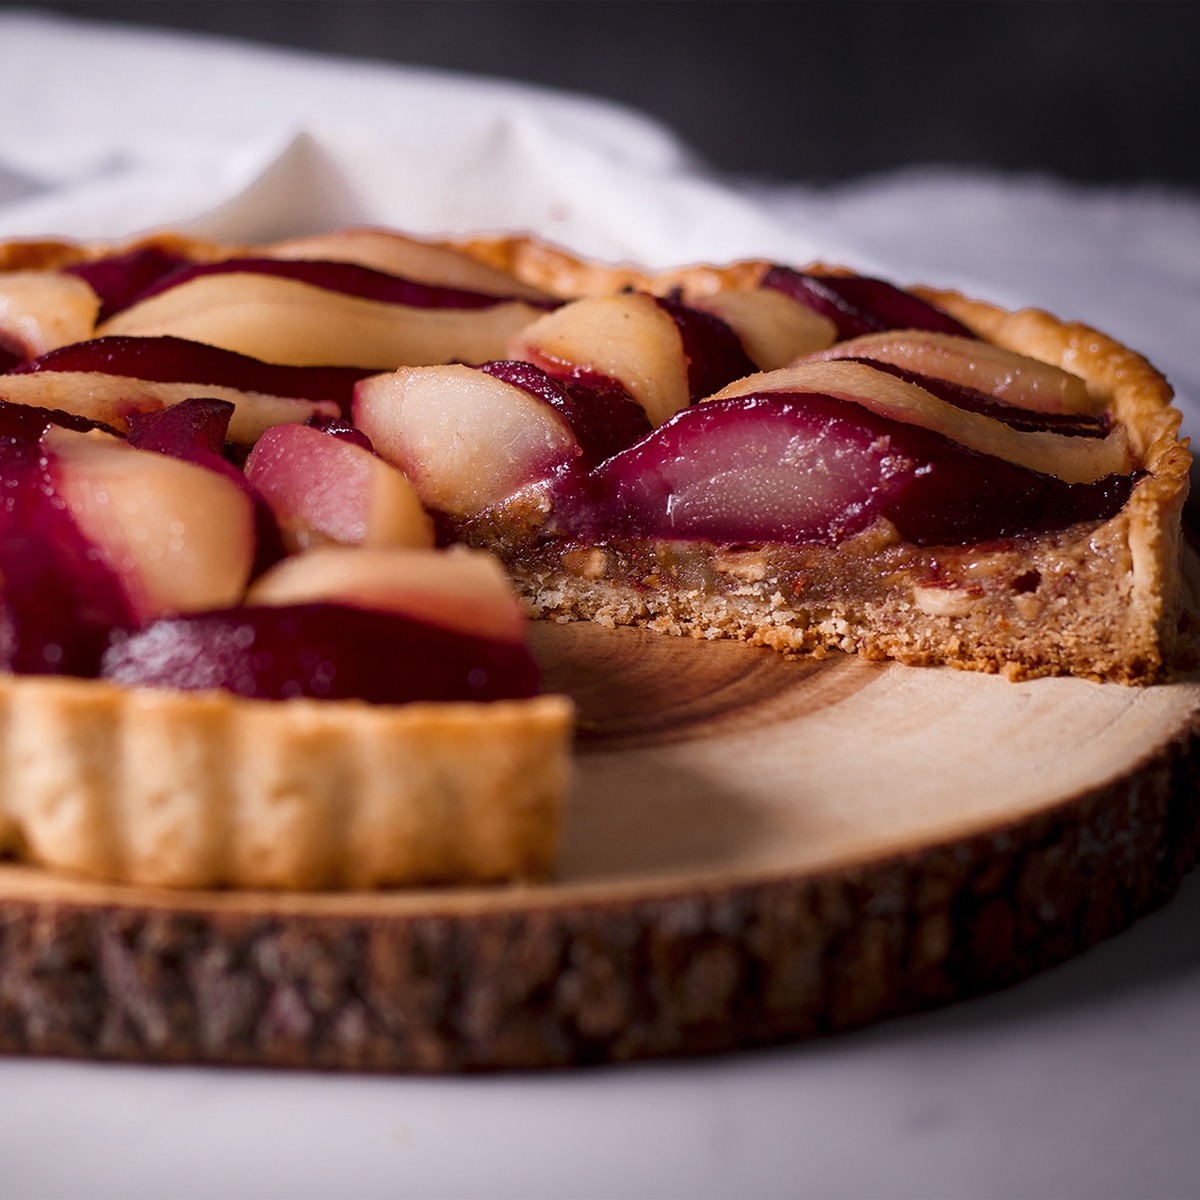
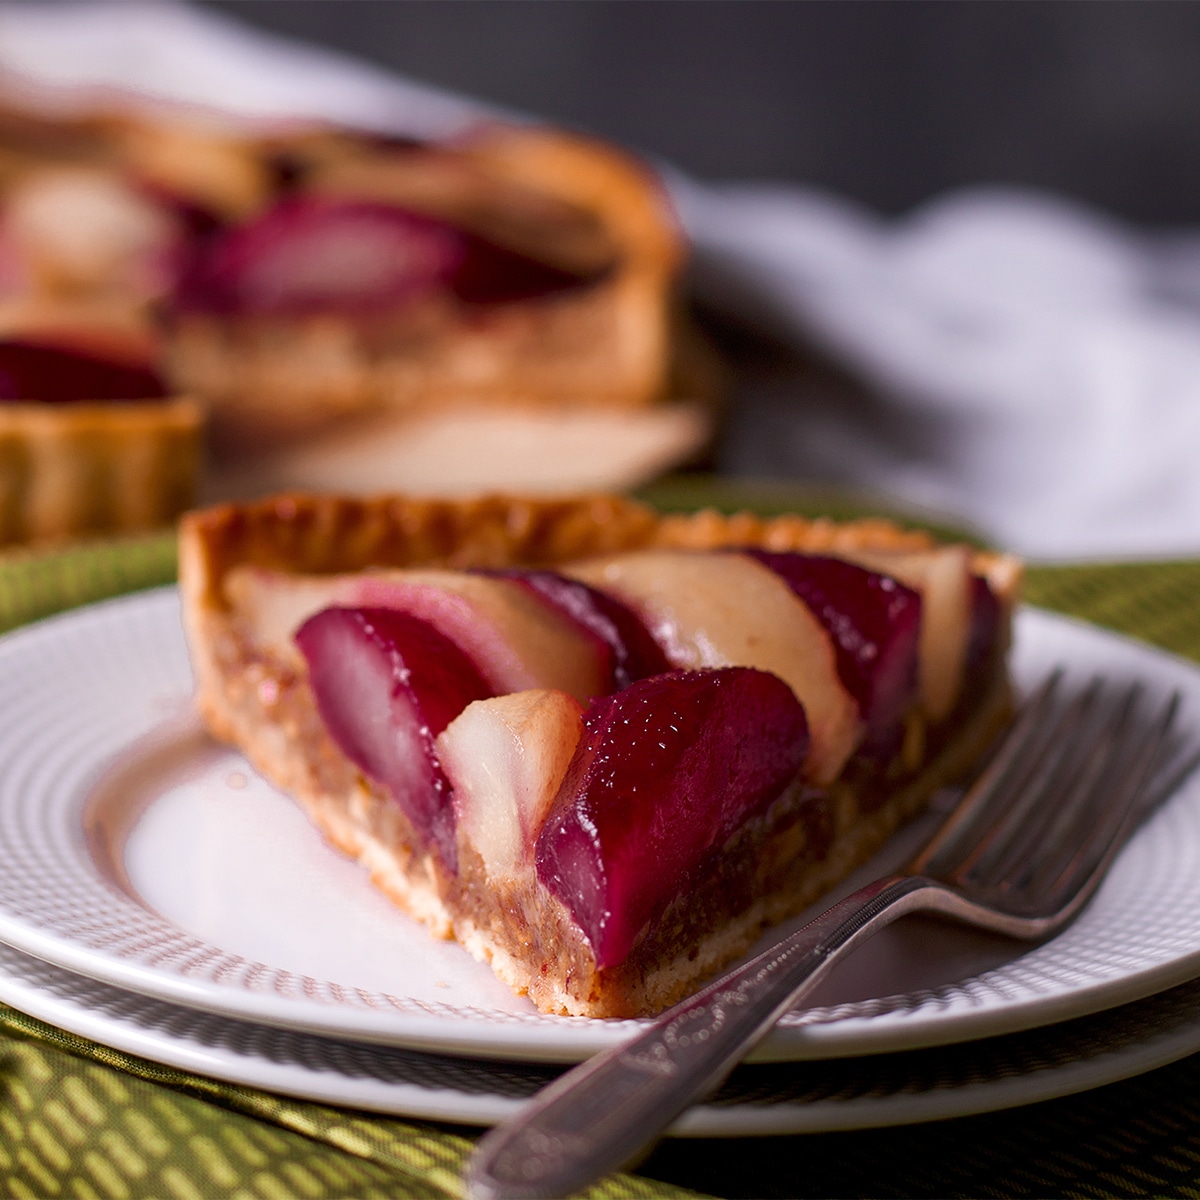
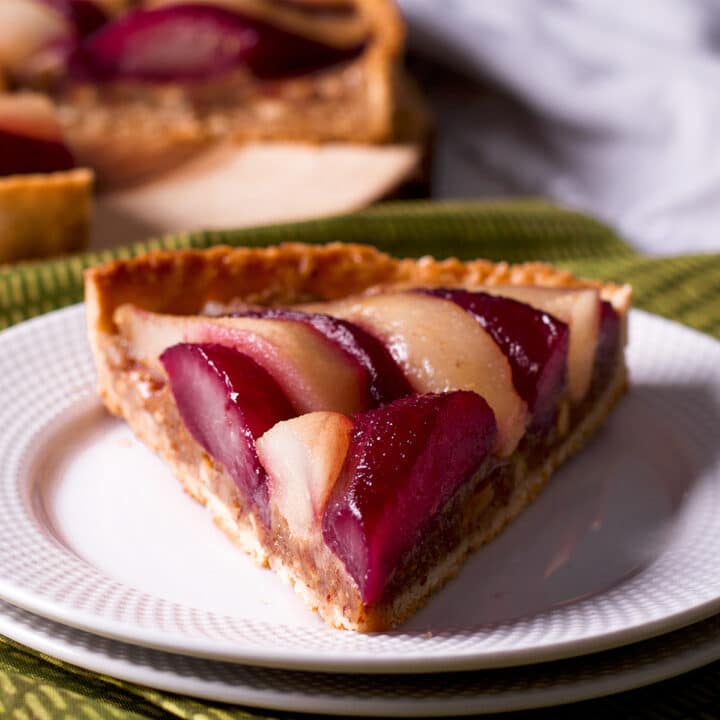
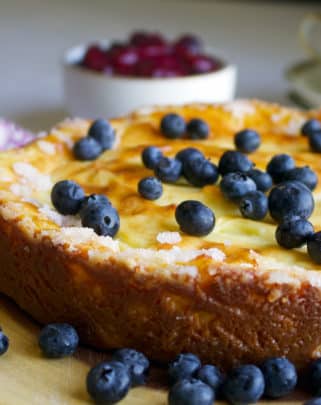
Topped with red and white wine-poached pears, this stunning Pear and Frangipane Tart tastes as impressive as it looks. And, while it might appear difficult to make, it's surprisingly simple. As most good things are.
This is one of those desserts that you make when you really want to impress people with your mad baking skills but you don't actually want to put in that much effort.
To be clear - this pear tart is not as simple as a quick batch of 1-hour cupcakes or a giant skillet-baked chocolate chip cookie. But, it's also not on the level of anything you'd need a degree in pastry arts to make. It just looks like it is.
Honestly, I think if you are someone with very little pastry experience, this tart is a great recipe. The dough comes together easily with the use of a stand mixer. The frangipane requires little more than blending all the ingredients in a food processor. And, poached pears are literally nothing more than sliced pears cooked in wine.
After that, all that's left to do, is bake the tart and bask in the oooooh's and ahhhhhhh's of everyone lucky enough to get a slice.
The tart is best eaten the day it's made, but each component - the pastry dough, frangipane, and poached pears - can be prepared days in advance.
Jump to:
- Ingredients Needed to Prepare this Recipe
- Step-by-Step Photos and Instructions
- Tips for Perfect Pastry
- How to Bake a Tart with an Extra Crispy Crust
- Tips for Making and Storing Poached Pears
- What to Do with the Leftover Pear Poaching Liquid
- How to Arrange the Pears on this Tart
- Make Ahead and Storage Instructions
- 📖 Recipe
- 💬 Comments
Ingredients Needed to Prepare this Recipe
The list of ingredients in the recipe card below is somewhat deceptive because I've separated them into sections for the pastry dough, frangipane, and poached pears. This, hopefully makes it easier to prepare the recipe, but can also make it look like there are more required ingredients than there actually are.
To simplify things a bit, here are all the ingredients you'll need to prepare this recipe:
- Butter. The pastry for this tart is an all-butter recipe which makes it both flavorful and extra crispy. Be sure to use unsalted butter so that you have more control over the amount of salt in the tart.
- All-purpose flour. Preferably unbleached.
- Granulated sugar. Just enough sugar to make it sweet but not cloying.
- Baking powder.
- Salt. Each component contains a bit of salt which helps to bring out the individual flavors in this tart without ever tasting salty.
- Heavy cream. Heavy cream in the dough makes it incredibly rich and tender.
- Bosc pears. Bosc pears are firm and retain their shape better than other varieties which makes them perfect for baking and poaching.
- 1 bottle of semi-sweet white wine. I like to use Riesling.
- 1 bottle of dry red wine. I like to use a cabernet or red blend. With both bottles of wine, choose something that's good enough to drink, but there's no need to break the bank. If the wine tastes good to you out of the bottle, the wine poached pears will taste good to you as well.
- 1 orange. A few strips of orange peel in the wine poaching liquid infuses the pears with a subtle, but lovely citrus flavor.
- Vanilla extract and almond extract.
- Dry roasted, unsalted almonds.
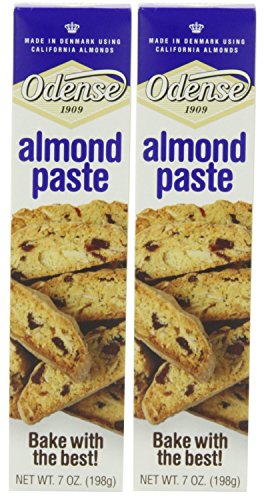
- Almond paste. Almond paste can be found in the baking isle of most major supermarkets, but if yours doesn't carry it, you can order it online.
- 1 large egg plus 1 large egg yolk. That extra yolk gives the frangipane extra richness and flavor.
Step-by-Step Photos and Instructions
STEP #1: Make the Tart Dough

Put the butter in the freezer for about 20 minutes until it's very cold but not completely frozen.
In the meantime, add the flour, sugar, baking powder, and salt to the bowl of a stand mixer and stir it around.
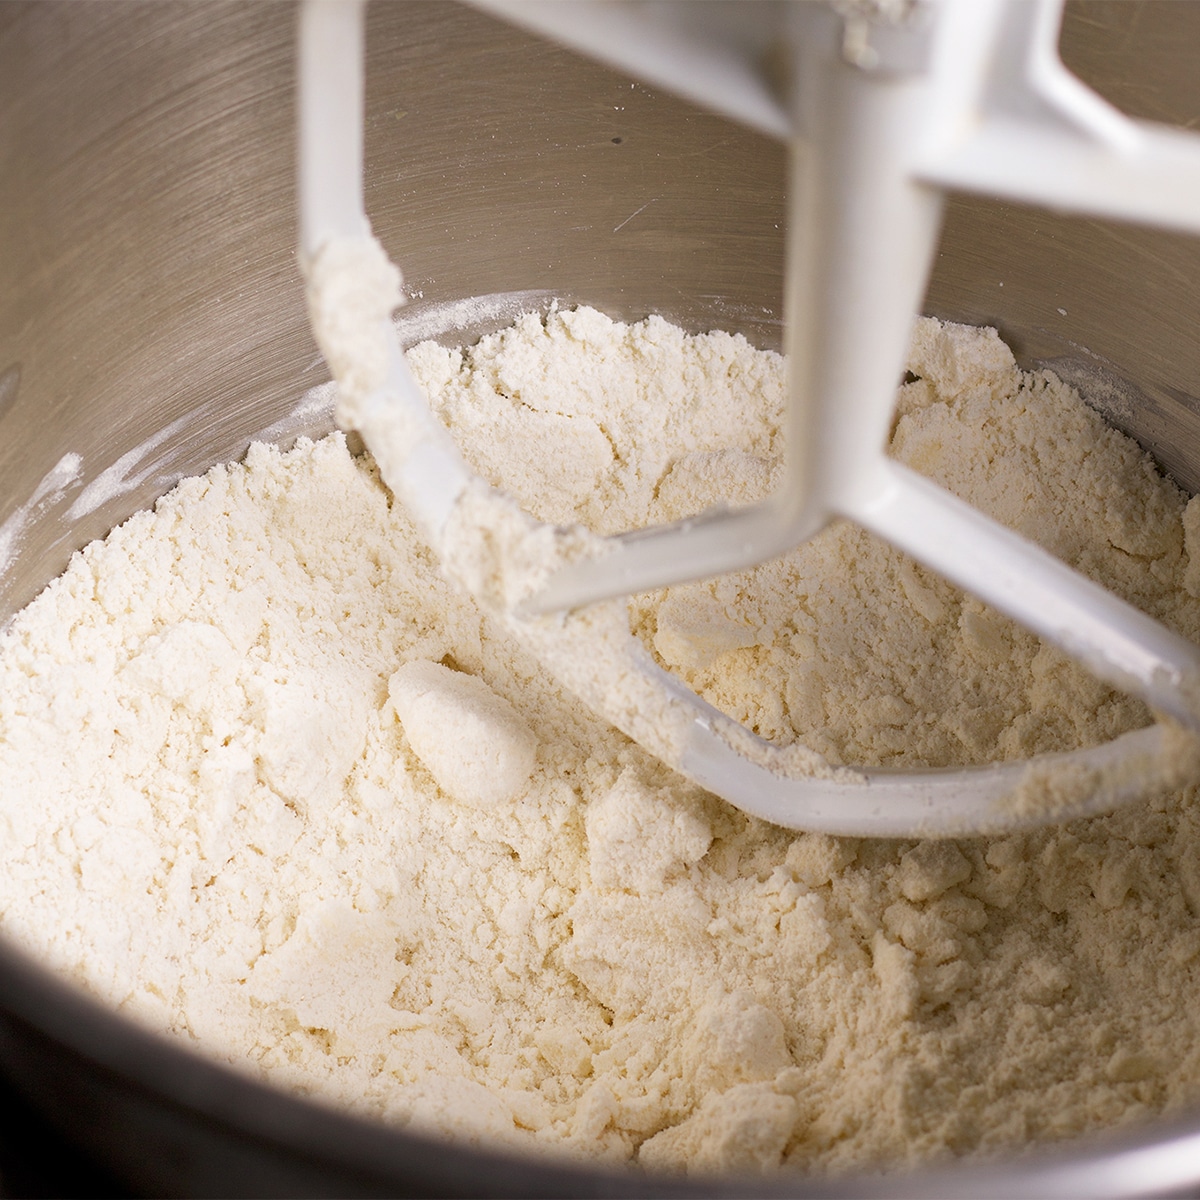
While the mixer runs on low speed, add the partially frozen butter a few pieces at a time. Continue to mix until there are no pieces of butter larger than a kidney bean.
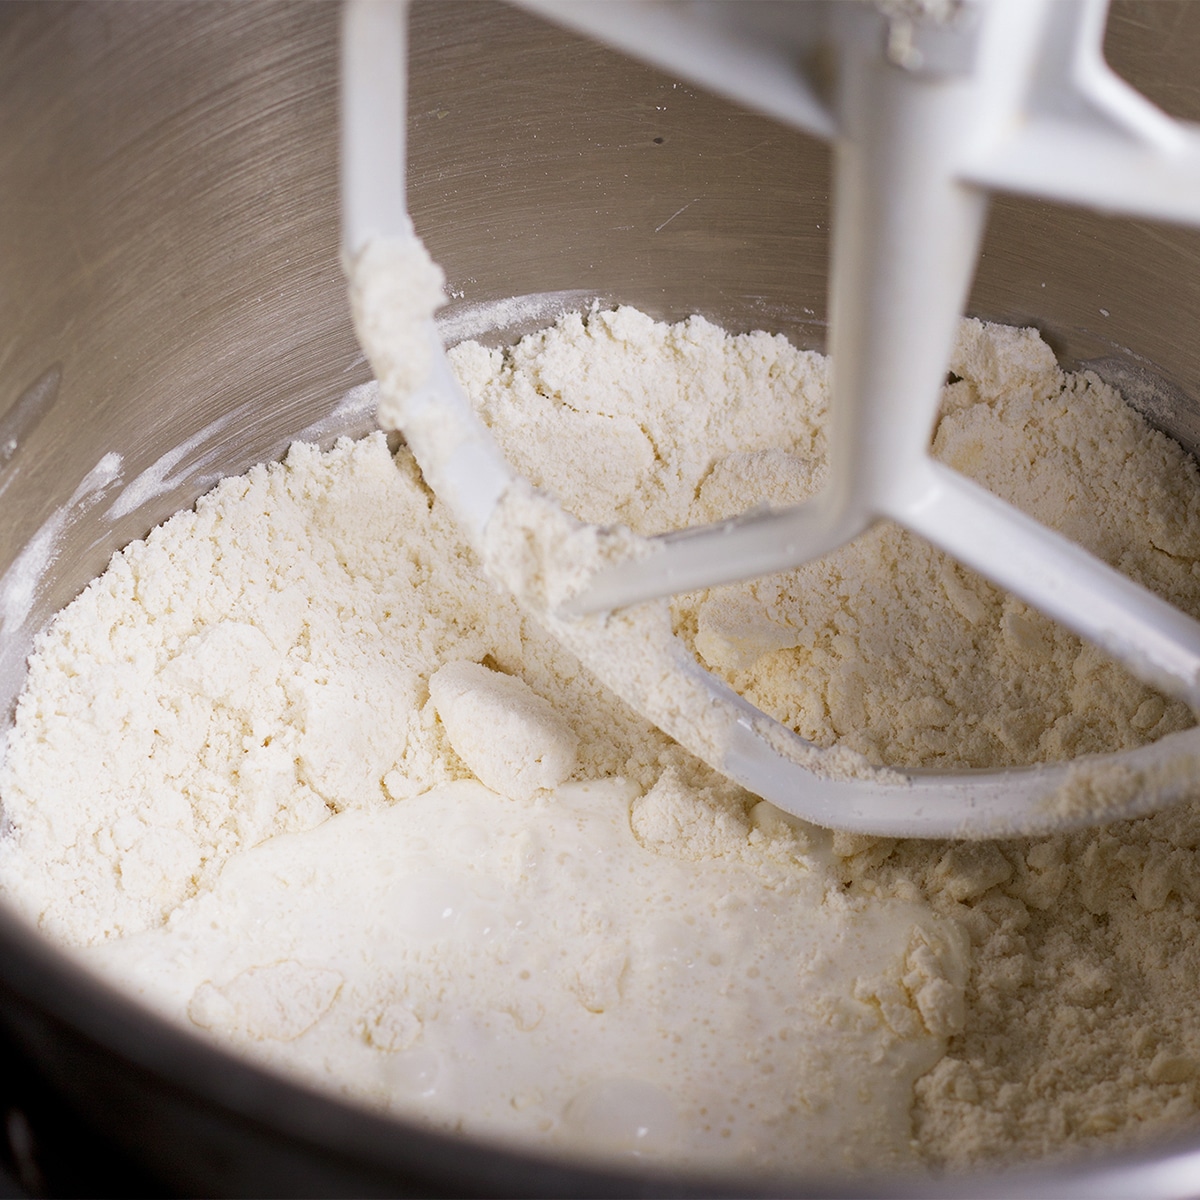
With the mixer still running, add the cream, mixing on low to combine. Then add only enough ice water to bring the dough together.
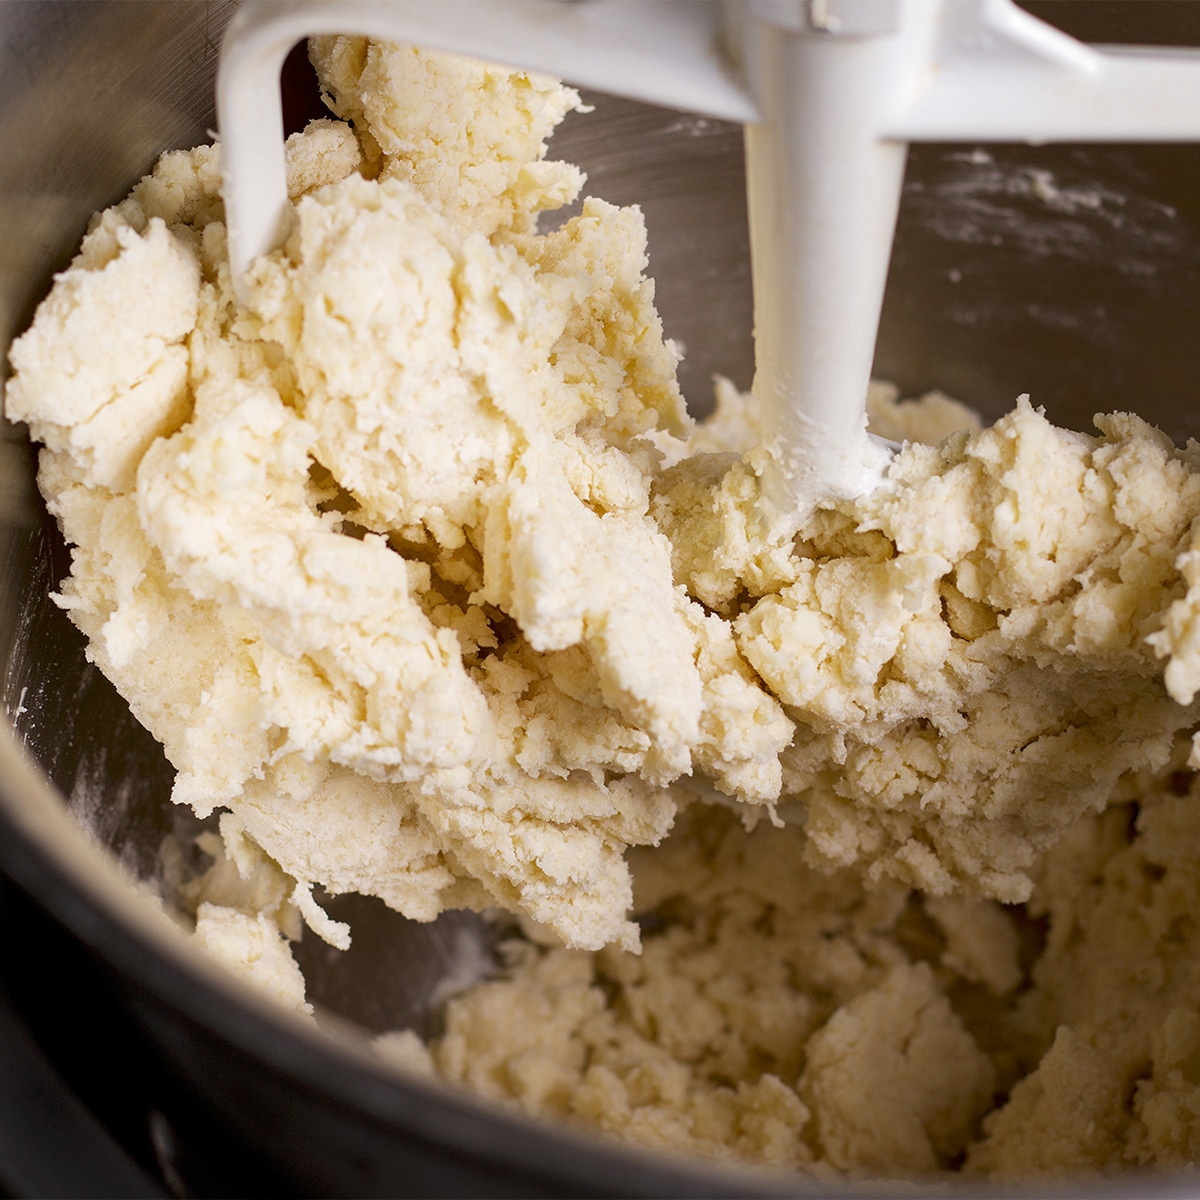
Be careful to not add too much water. You want only enough to hold the dough together. Wrap the dough in plastic wrap and pop it in the refrigerator for at least 2 hours.
STEP #2. Prepare the Wine Poached Pears
Pour the red wine into one saucepan and the white wine in another saucepan. Add some sugar, a pinch of salt, and strips of orange peel to both saucepans.
Peel the pears and slice each one into 8 pieces.
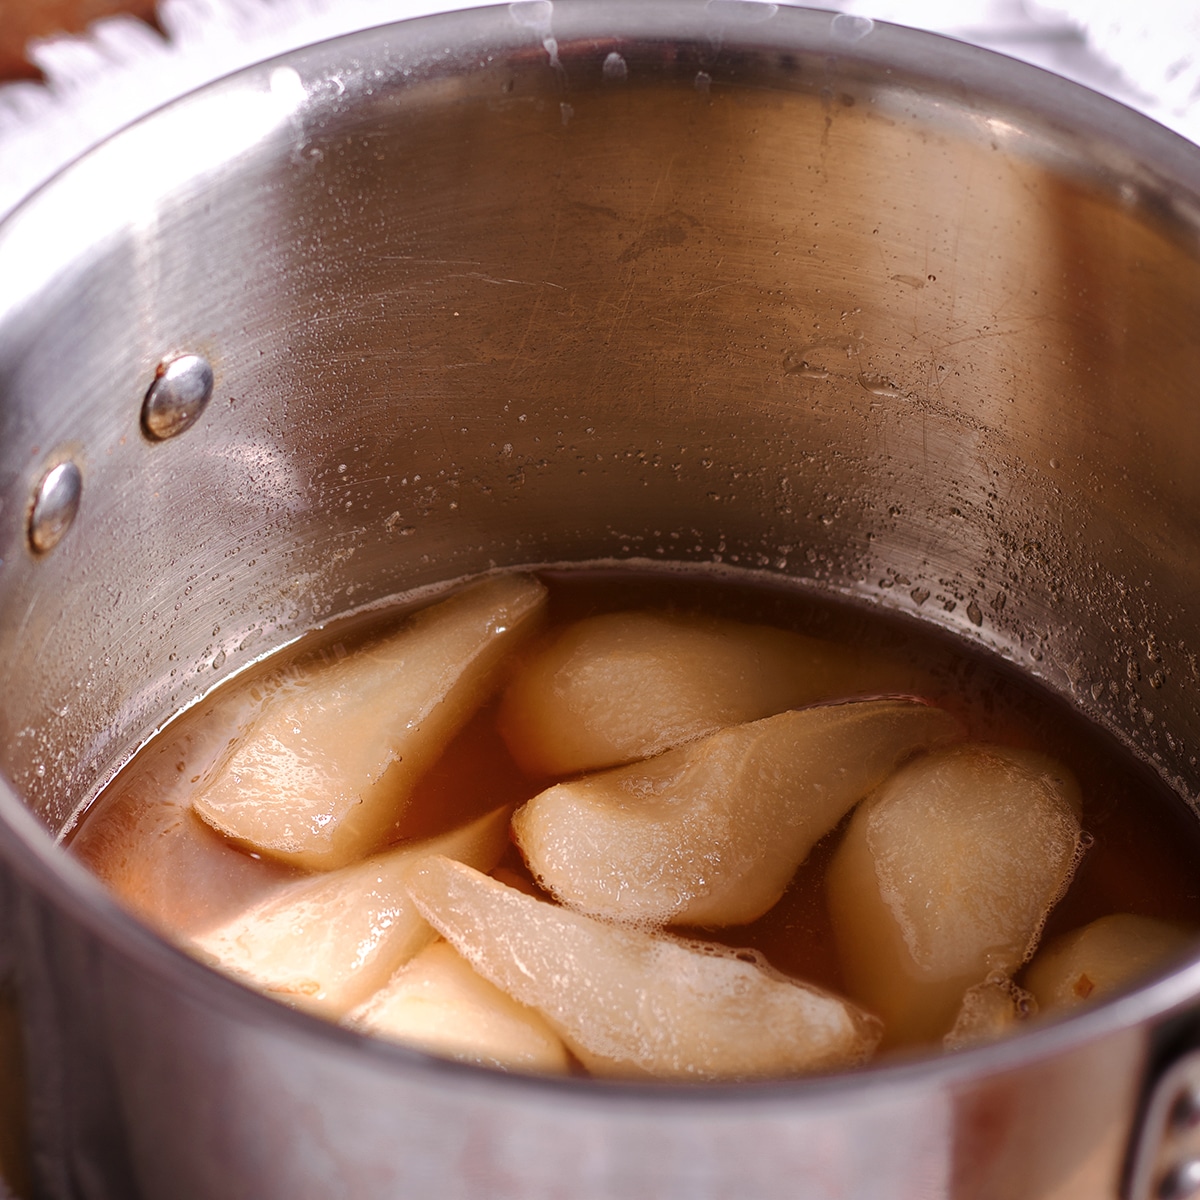
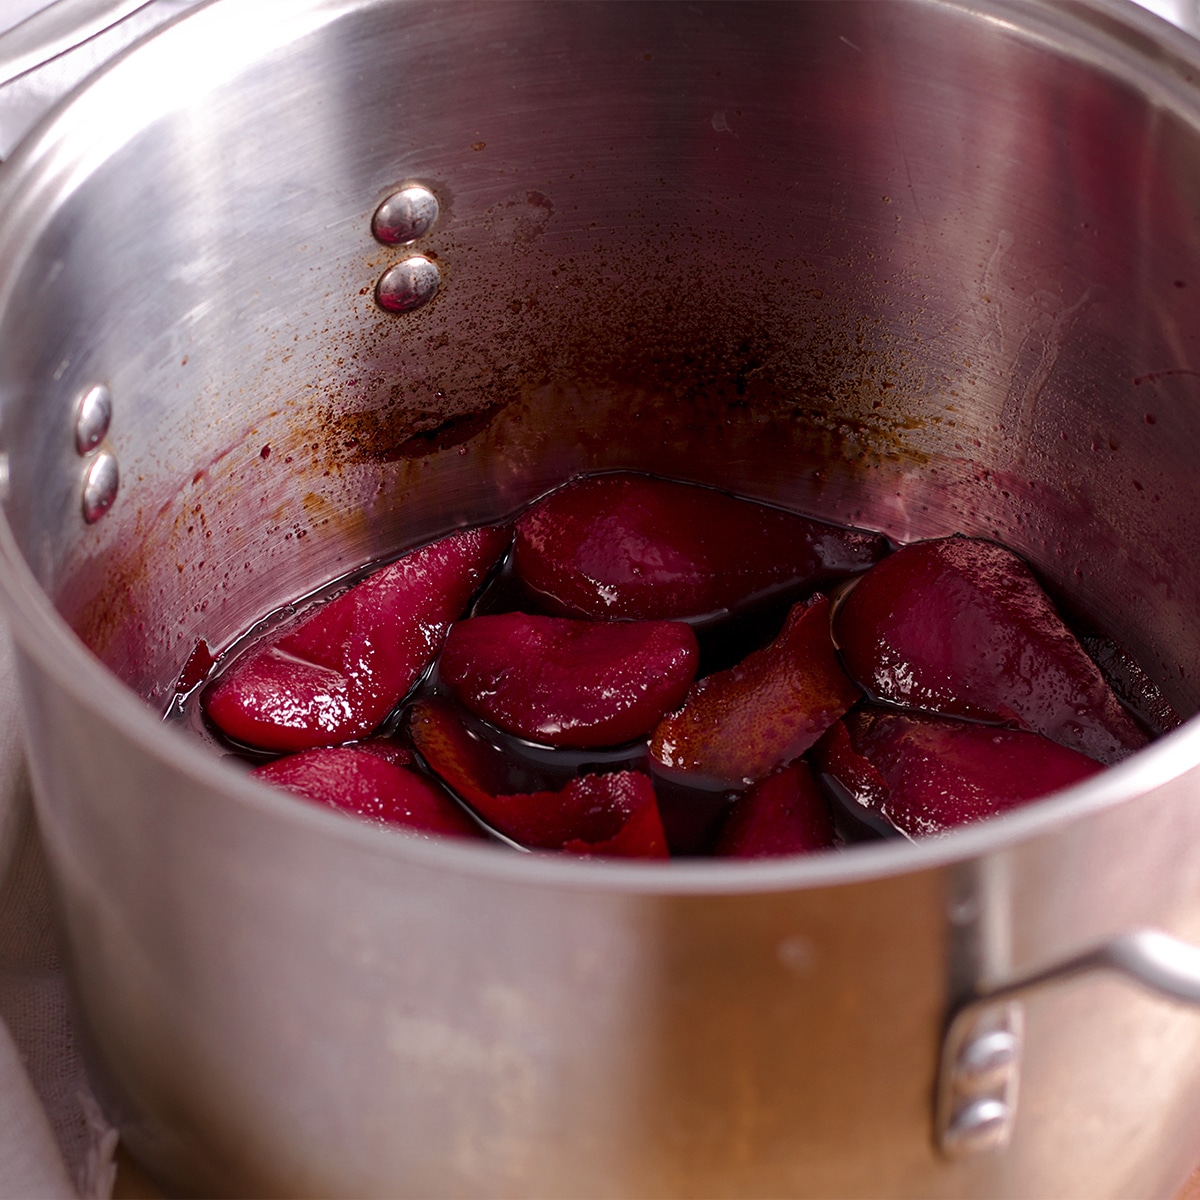
Bring the wine in both saucepans to a boil and add the pears, distributing them evenly between both pans.
Let the pears simmer for 10 minutes, then turn off the heat and let the pears soak in liquid until it is completely cool.
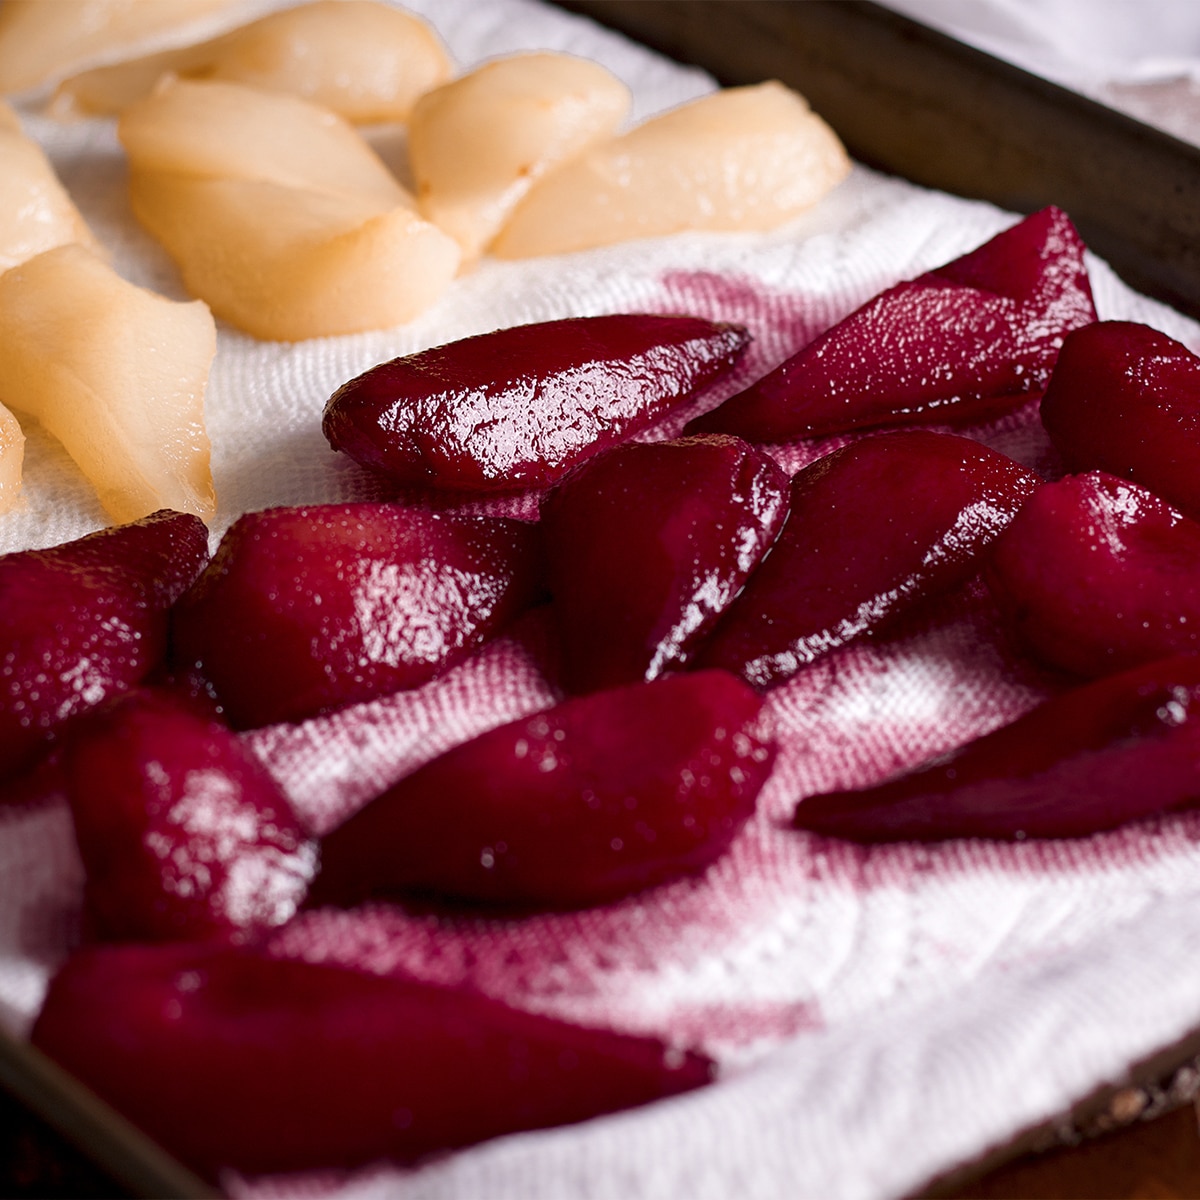
Lay the poached pears out on paper towels to drain.
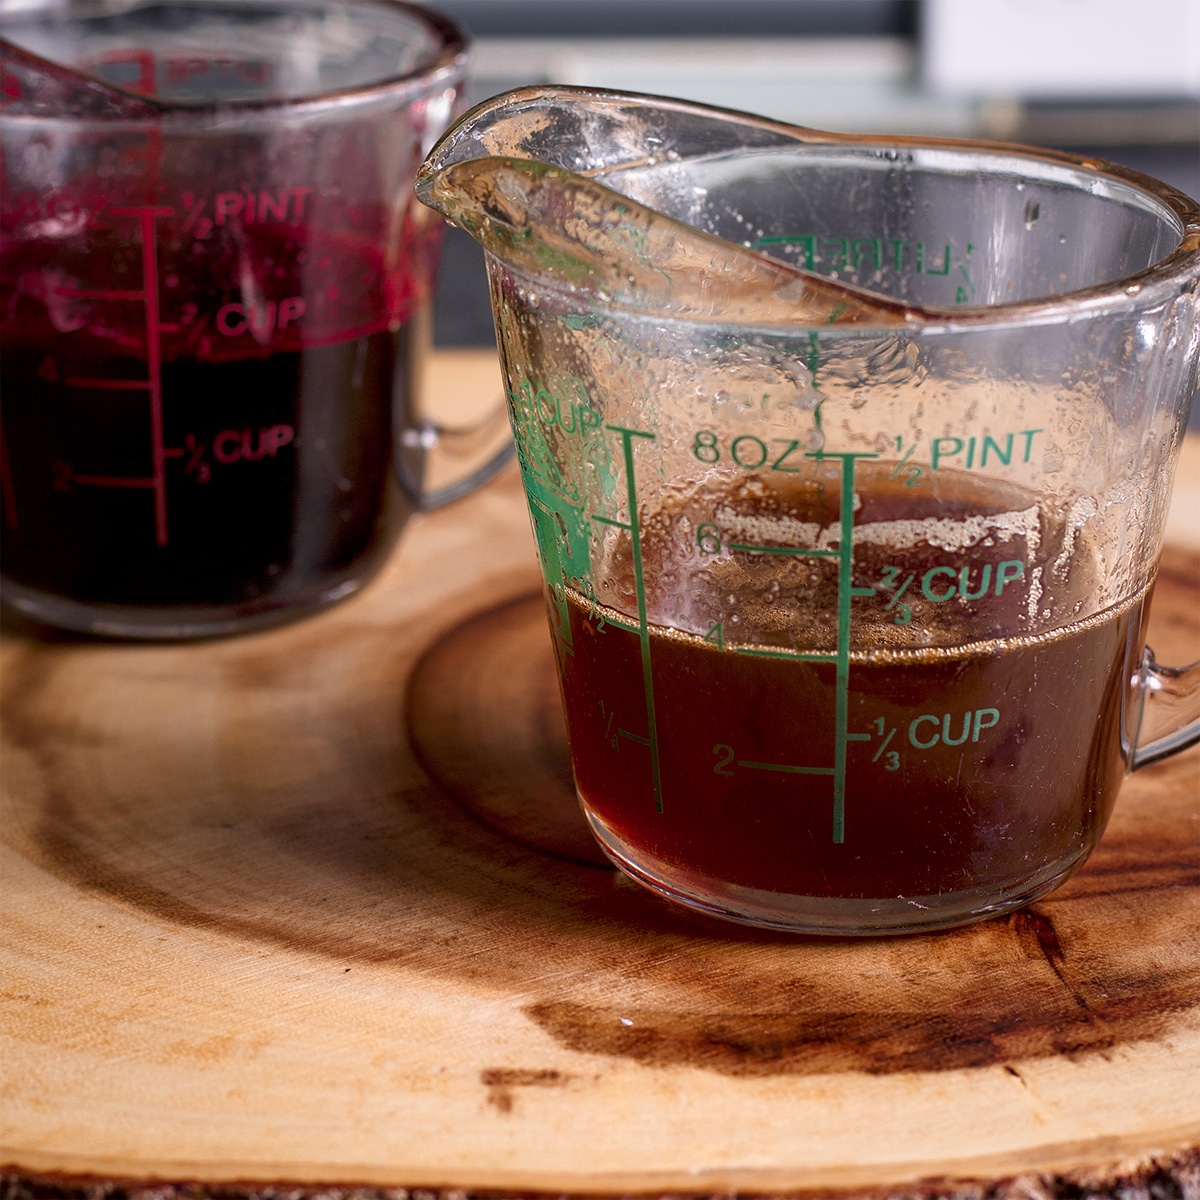
Set the pan of white wine poaching liquid back over medium high heat and bring to a boil. Cook until the liquid is reduced to about ½ cup. Remove from the heat and stir in vanilla. This is now your glaze.
STEP #3: Prepare the Frangipane
What is frangipane? Frangipane, also called Almond Cream, is a paste made from ground almonds, almond paste, sugar, butter, and eggs. It's often compared to marzipan but it's closer in consistency to pastry cream and often used in the same way - as a filling for pastries like croissants, tarts, and cakes.
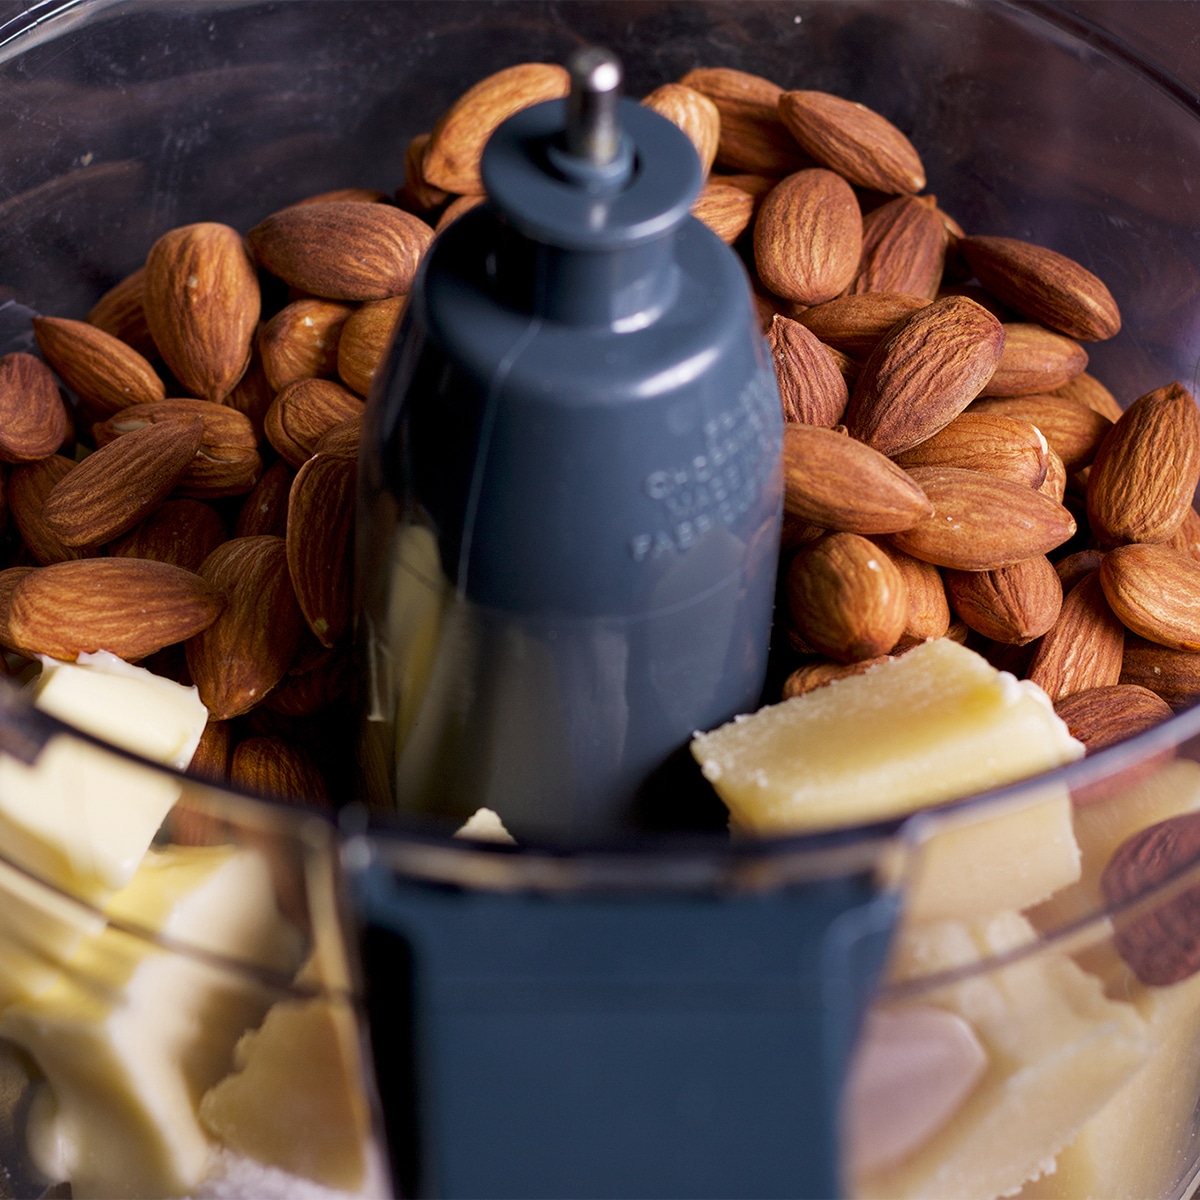
Add the almonds and sugar to the bowl of a food processor fitted with the chopping blade. Process until the almonds are roughly ground with no pieces larger than pea size.
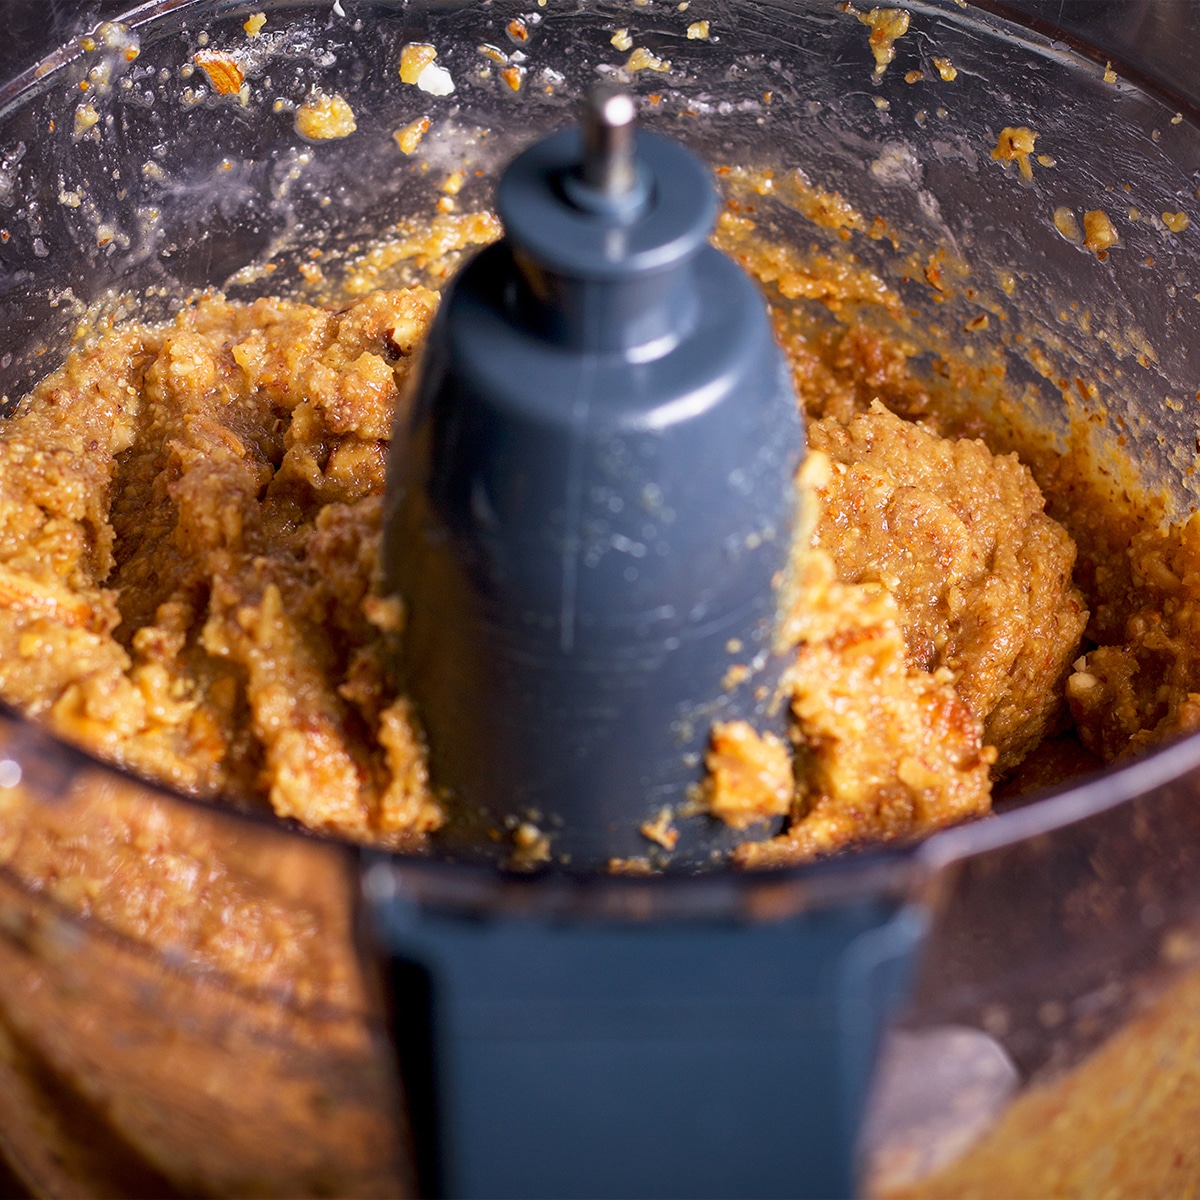
Add the remaining frangipane ingredients and process until the mixture is a homogenous paste.
STEP #4: Assemble and Bake the Tart
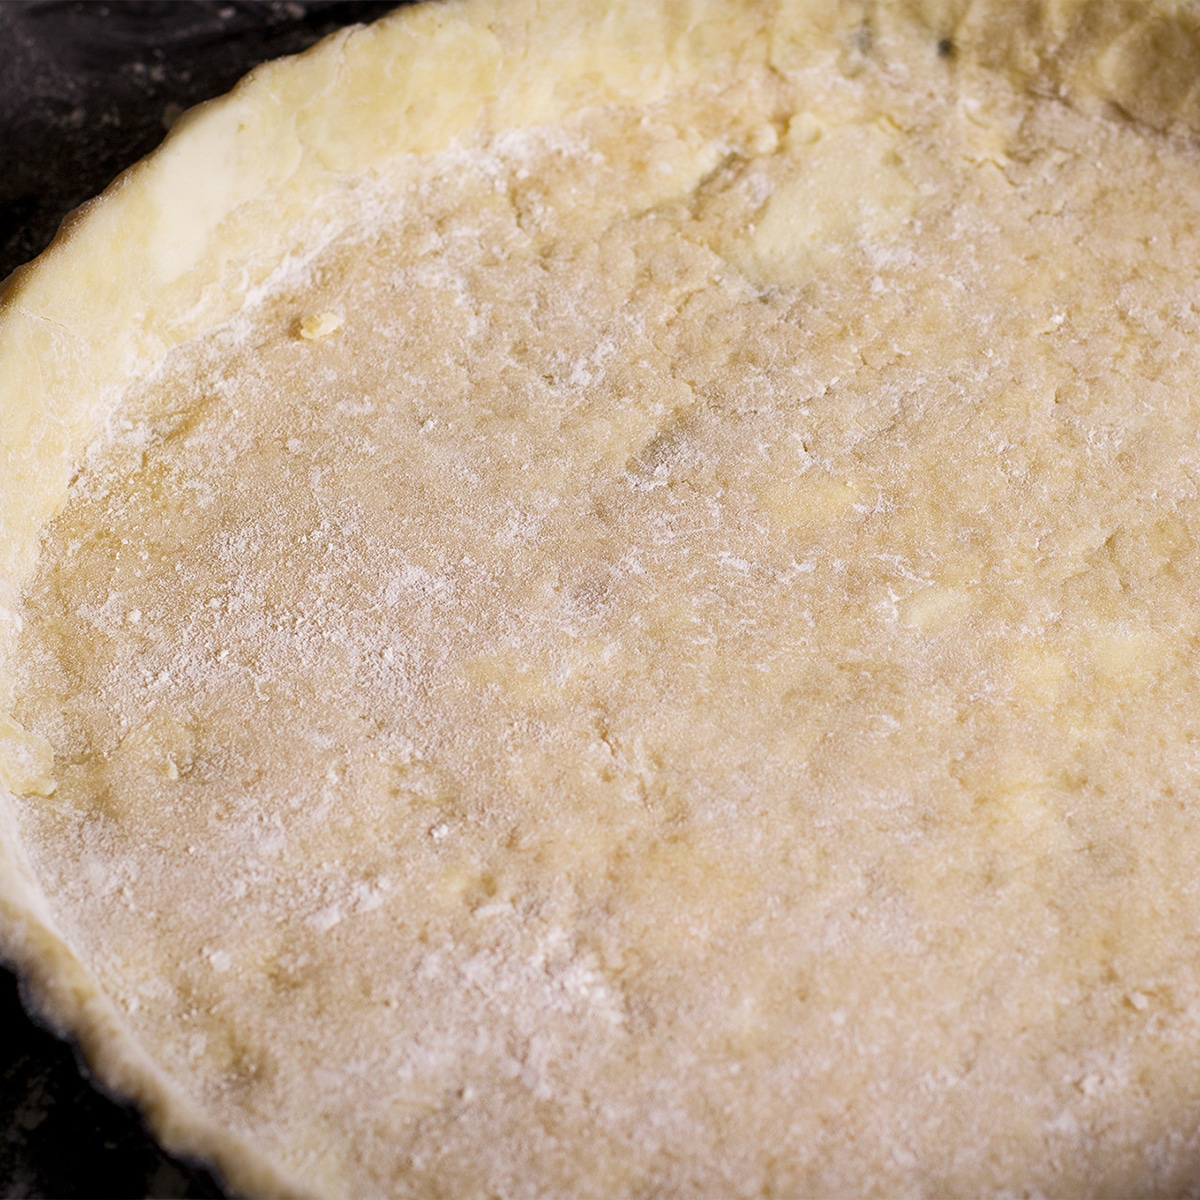
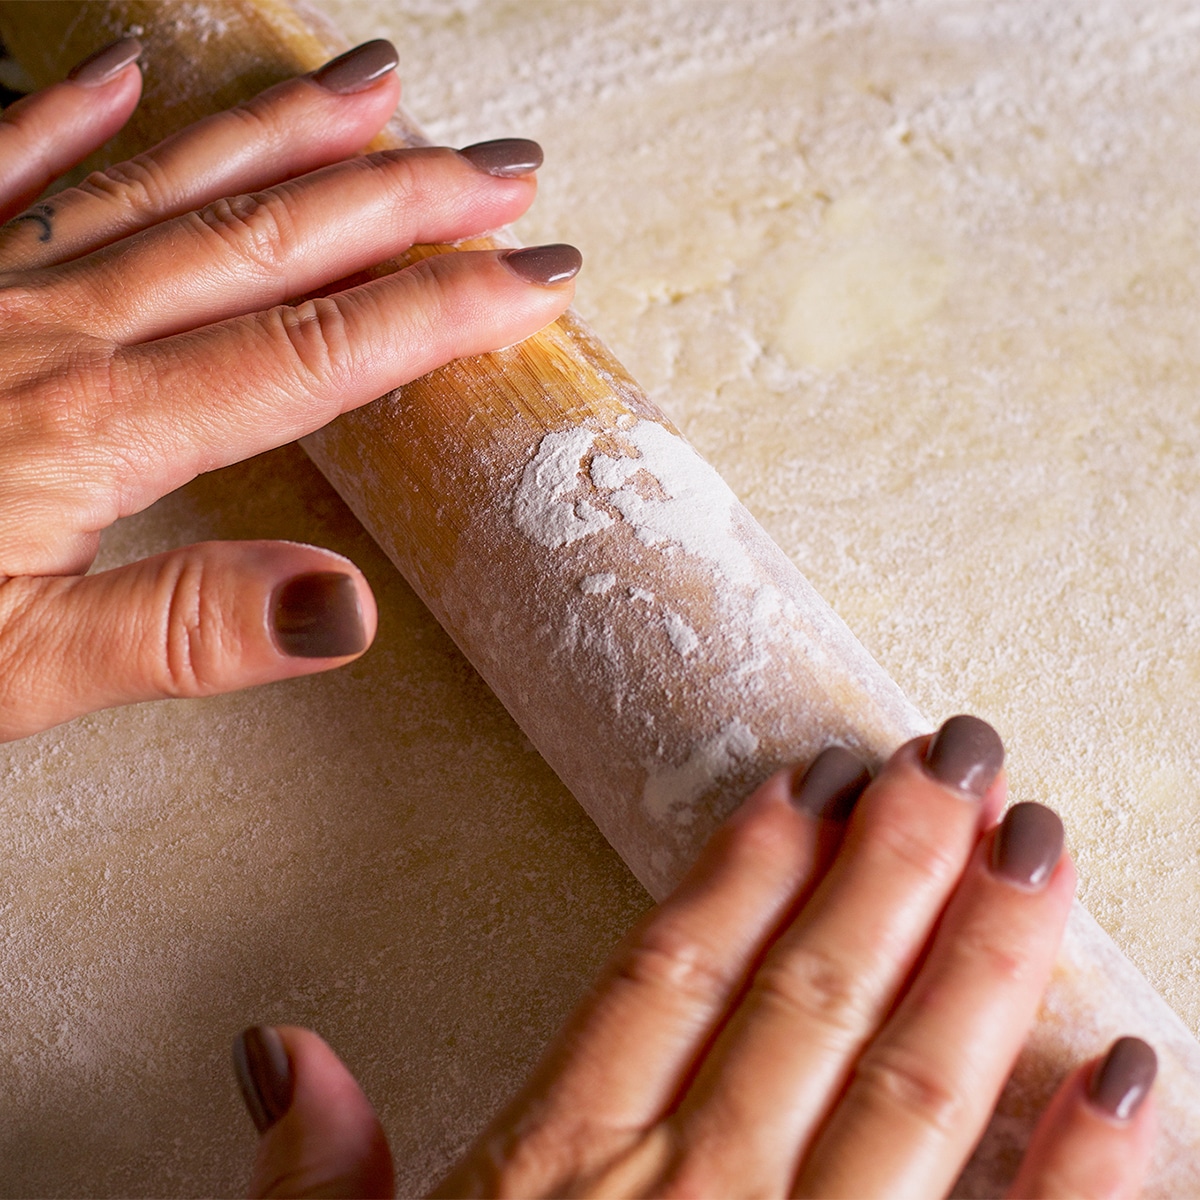
Roll out the pastry dough and fit it inside the pan, pressing the dough into every nook and cranny.
Cover the pastry and let it rest in the freezer for 20 minutes.
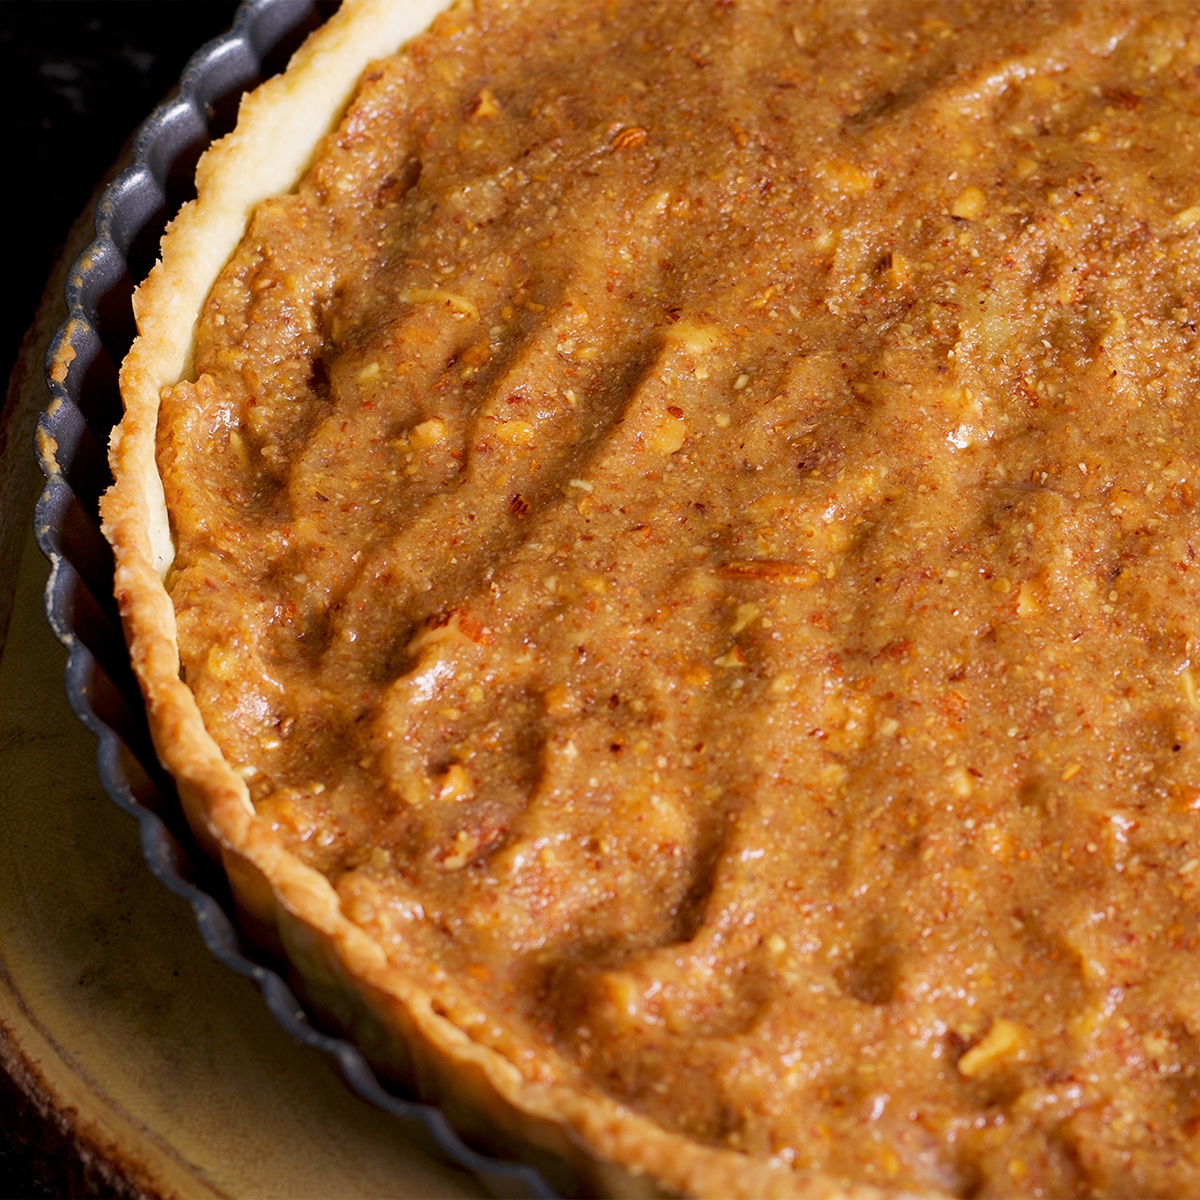
Scatter the frangipane over the bottom of the pastry then use your fingers to press it into an even layer.
Arrange the pear slices over the frangipane in whatever pattern you desire.
Bake the tart at 425 degrees for 20 minutes. Reduce the heat to 400 degrees and bake for 15 minutes. Reduce the heat to 350 degrees and bake for 20 minutes.
Allow the tart to cool completely then use a pastry brush to coat the pears with a layer or two of white wine glaze and serve.
Tips for Perfect Pastry
Tip #1: Keep the pastry cold
Preparing this pastry dough is simple but it's important to keep it cold all the time. Cold butter is less likely to be absorbed by the flour so when you roll the pastry out, you get some interwoven layers of fat and flour.
If the butter melts and blends into the flour before baking, you'll end up with a dense, cardboard-like texture. Not what we're going for here. Also, warm pastry dough is super difficult to work with.
So, before you begin to make the dough, cut the butter into chunks and pop it into the freezer for about 20 minutes to partially freeze it. Then, let a stand mixer do the work of gently mixing the butter into the flour, adding some cream and water to bring it all together.
Tip #2: Be careful to not over mix the dough
Having a few small pieces of butter throughout the dough is a good thing!
As the tart bakes, the butter melts and leaves little pockets in the dough. This process is what creates a pastry that's light and flaky.
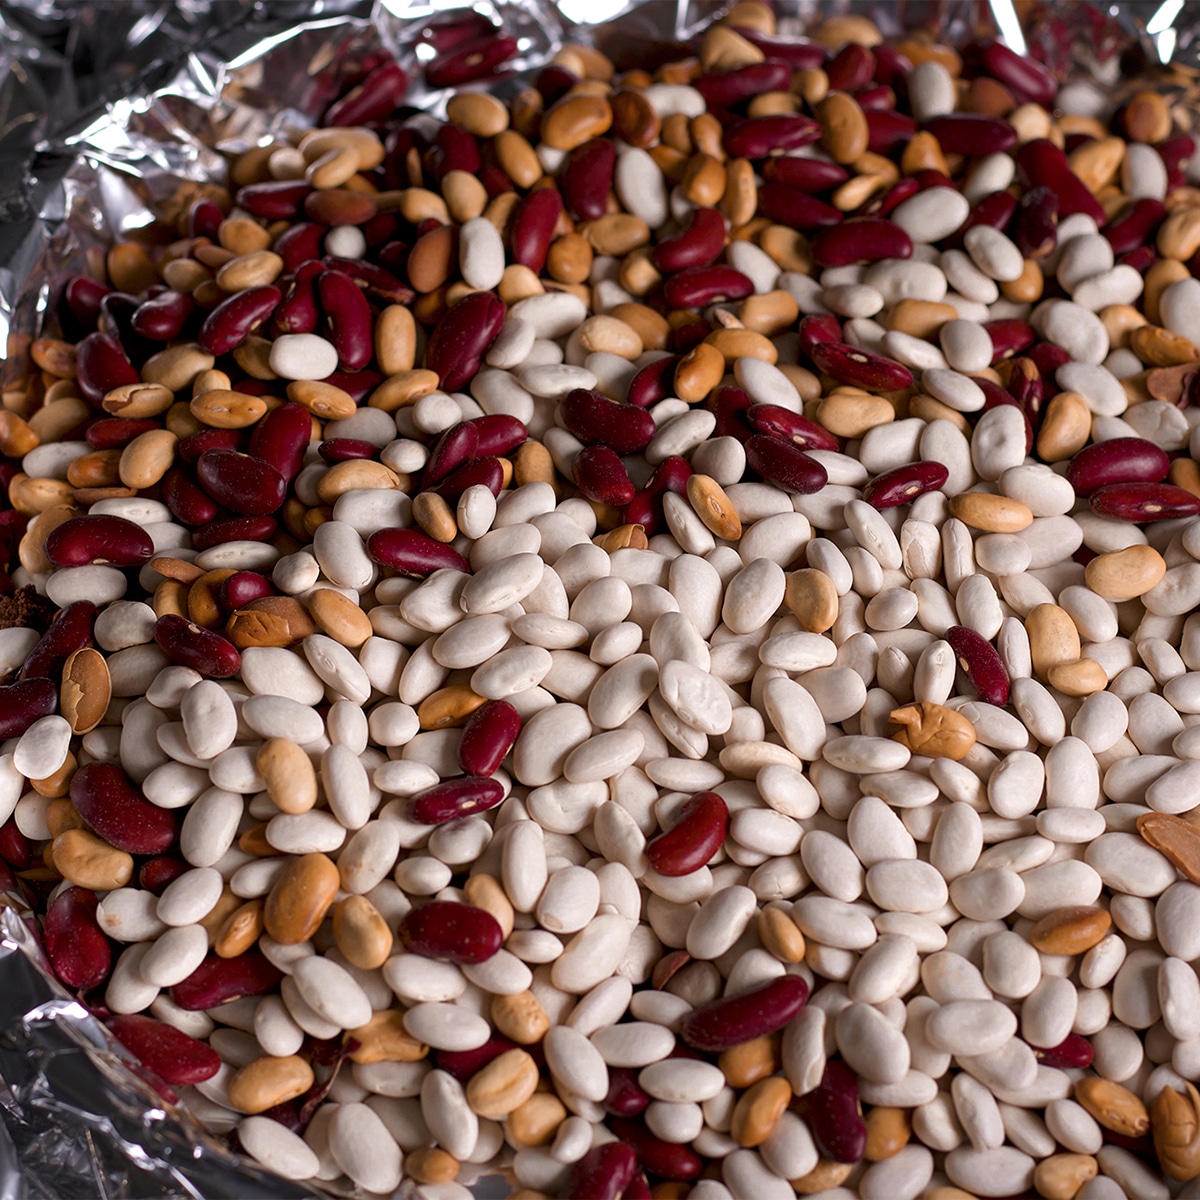
How to Bake a Tart with an Extra Crispy Crust
In this pear tart recipe, you'll see an option to partially pre-bake the crust before filling with frangipane and poached pears. This is simply a matter of taste.
If you decide to not pre-bake the crust, the finished texture will be tender and delicious. It will still be sturdy enough to hold slices of tart together, allowing you to serve beautiful slices. But it won't have an audible crunch as you slice and eat it.
If you decide you want to pre-bake the crust, the finished texture will be quite crispy. The difference in texture is similar to the difference between a fig newton and vanilla wafer. Both are delicious, it just depends on what you're going for.
If you decide to partially pre-bake your pie crust, here's what to do:
- After making and chilling the dough for at least 2 hours, heat the oven to 400 degrees.
- Roll out the dough and press it into a tart pan. Cover and freeze for 20 minutes.
- Remove the tart pan from the freezer and line the inside with aluminum foil then fill with dried beans or pie weights. This will hold the pastry down while it bakes.
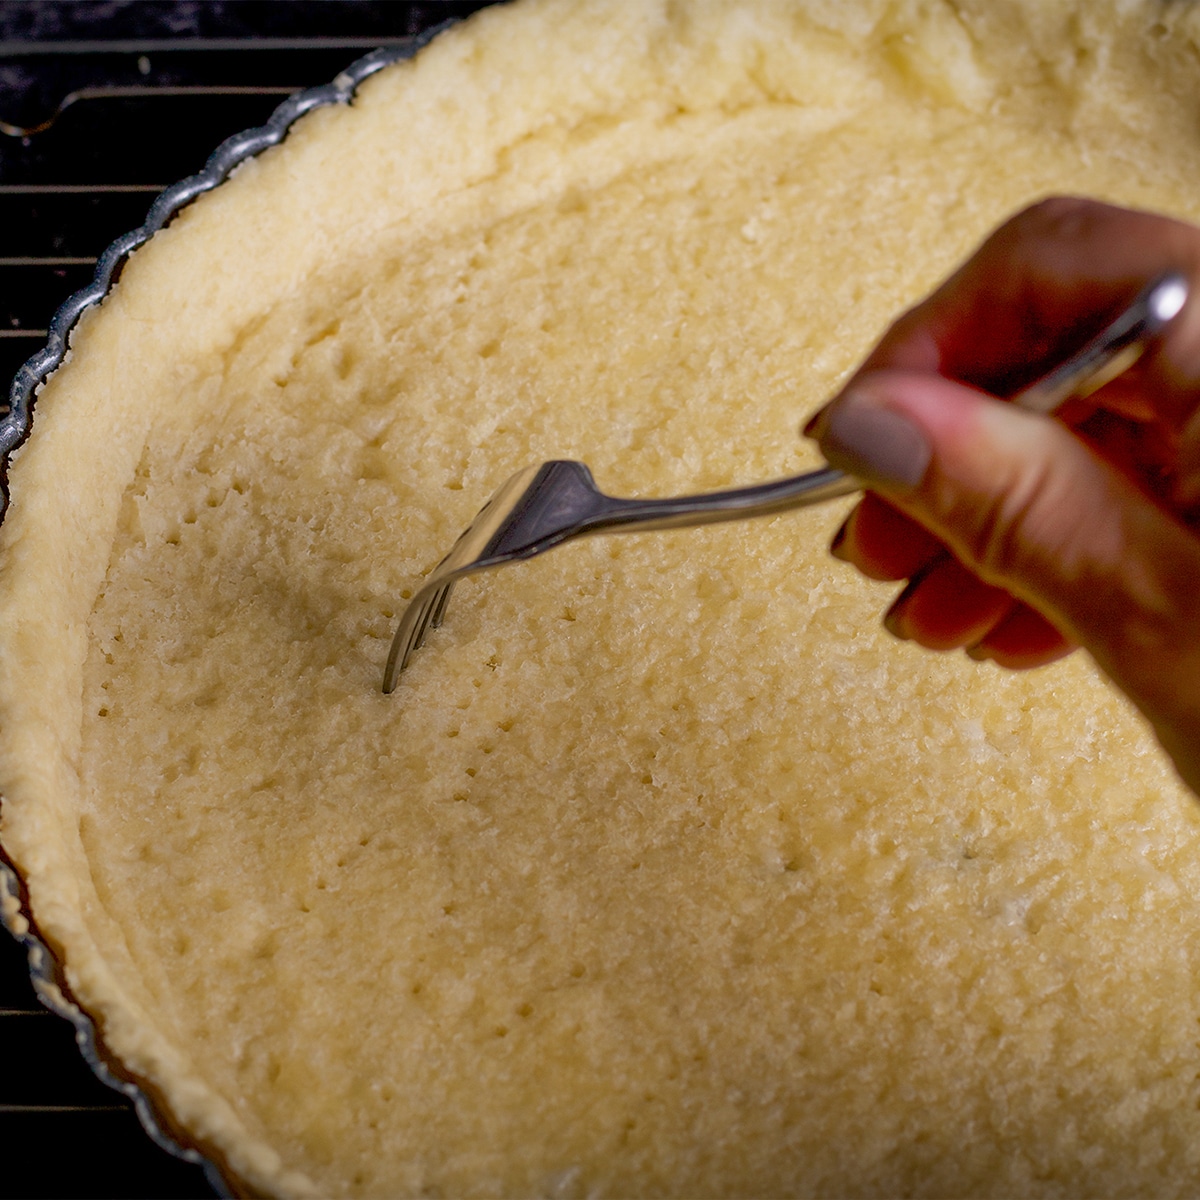
- Bake the pastry for 17 minutes. Take the pan out of the oven and remove the beans and foil. Use a fork to poke holes across the surface of the dough (another measure to prevent the dough from puffing up while baking).
- Bake for an additional 10 minutes. Let cool completely before filling and baking the tart.
Tips for Making and Storing Poached Pears
Honestly, as much as I love this tart, give me a plate of nothing but these poached pears and I will be blissfully happy. I'm telling you... something magical happens when you cook pears in wine.
The process is simply a matter of peeling and slicing pears and cooking them for a few minutes in red and white wine.
The pears will keep for up to a week if you store them in the cooking liquid, so you can prepare them days in advance.
The only dangerous thing about making them ahead of time is that you might eat them all before you've had a chance to make the tart. 🙄
What kind of pears to use and how to determine that they're ripe:
- It's important to use Bosc pears because they are both flavorful and firm enough to not fall apart during the poaching process. Softer pears, like Bartlett, have a tendency to fall apart when you cook them.
- To determine whether your pears are ripe, squeeze the top of the pear gently between your fingers. If you feel a slight give, they are ripe.
- If your pears are underripe, don't worry. Simply let them simmer in the wine for a bit longer - 15 or 20 minutes. Every few minutes, poke one of them with a fork to see if it's tender. When it is, they're done.
What to Do with the Leftover Pear Poaching Liquid
For this recipe, I mostly decided to poach half the pears in white wine and half the pears in red wine for the color. I love how pretty they look, red and white, across the top of this tart. But, I soon discovered that the subtle difference in flavor between the pears poached in red wine and the poached in white wine is also a good reason to do both.
On that note, if you are one of those people who either:
- doesn't like red wine or
- doesn't like white wine, or
- doesn't like wine at all (😩)...
I'm on my knees begging you to try the recipe as is.
Both the red and white wine poaching liquid contain some sugar to sweeten them up and cancel out any bitterness. As the pears poach, all the alcohol evaporates, leaving behind a gorgeous substance that is pure liquid gold. Or, as my friend Judy calls it, "the precious".
Seriously people. It doesn't matter what kind of a wine drinker you are or if you aren't a wine drinker at all. The liquid that's left behind after poaching is so incredibly delicious.
The recipe instructs you to let this liquid gold simmer for a while so that it reduces down into a syrup. The white wine syrup is then brushed over the baked tart, adding flavor, and giving it a lovely shine.
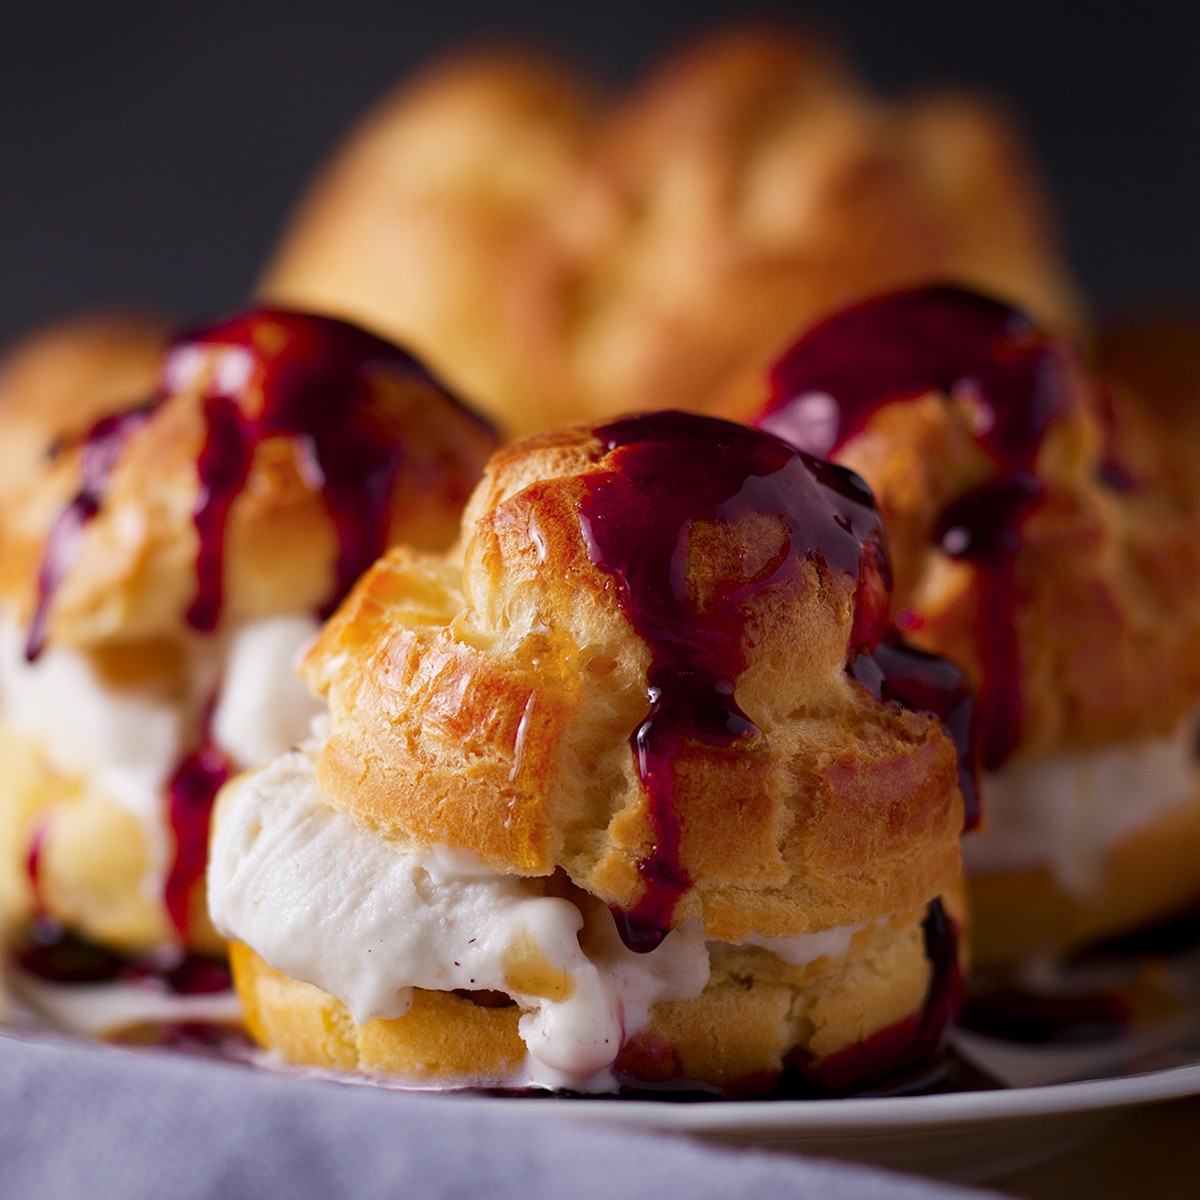
But, you'll have plenty left over. Keep both the red and white wine reductions in the refrigerator and then pour them over ice cream, cake, pancakes.... shoe leather... seriously, anything. You can also mix it into cocktails. Because it's liquid gold.Who wants a cocktail made with liquid gold? 🙋🏻♀️ ME, ME, ME!
My favorite thing to make with the leftover wine sauce...
Drizzle it over ice cream stuffed profiteroles.
Profiteroles (cream puffs) are buttery little balls of choux pastry (pâte à choux) baked until light, tender, and puffed up to form a hollow center.
They are the perfect vessel for pastry cream, ice cream, whipped cream, or anything your imagination, and taste buds, can dream up. But, filled with ice cream and topped with a drizzle of the red and white wine reductions from this tart is my all time FAVORITE way to eat them.
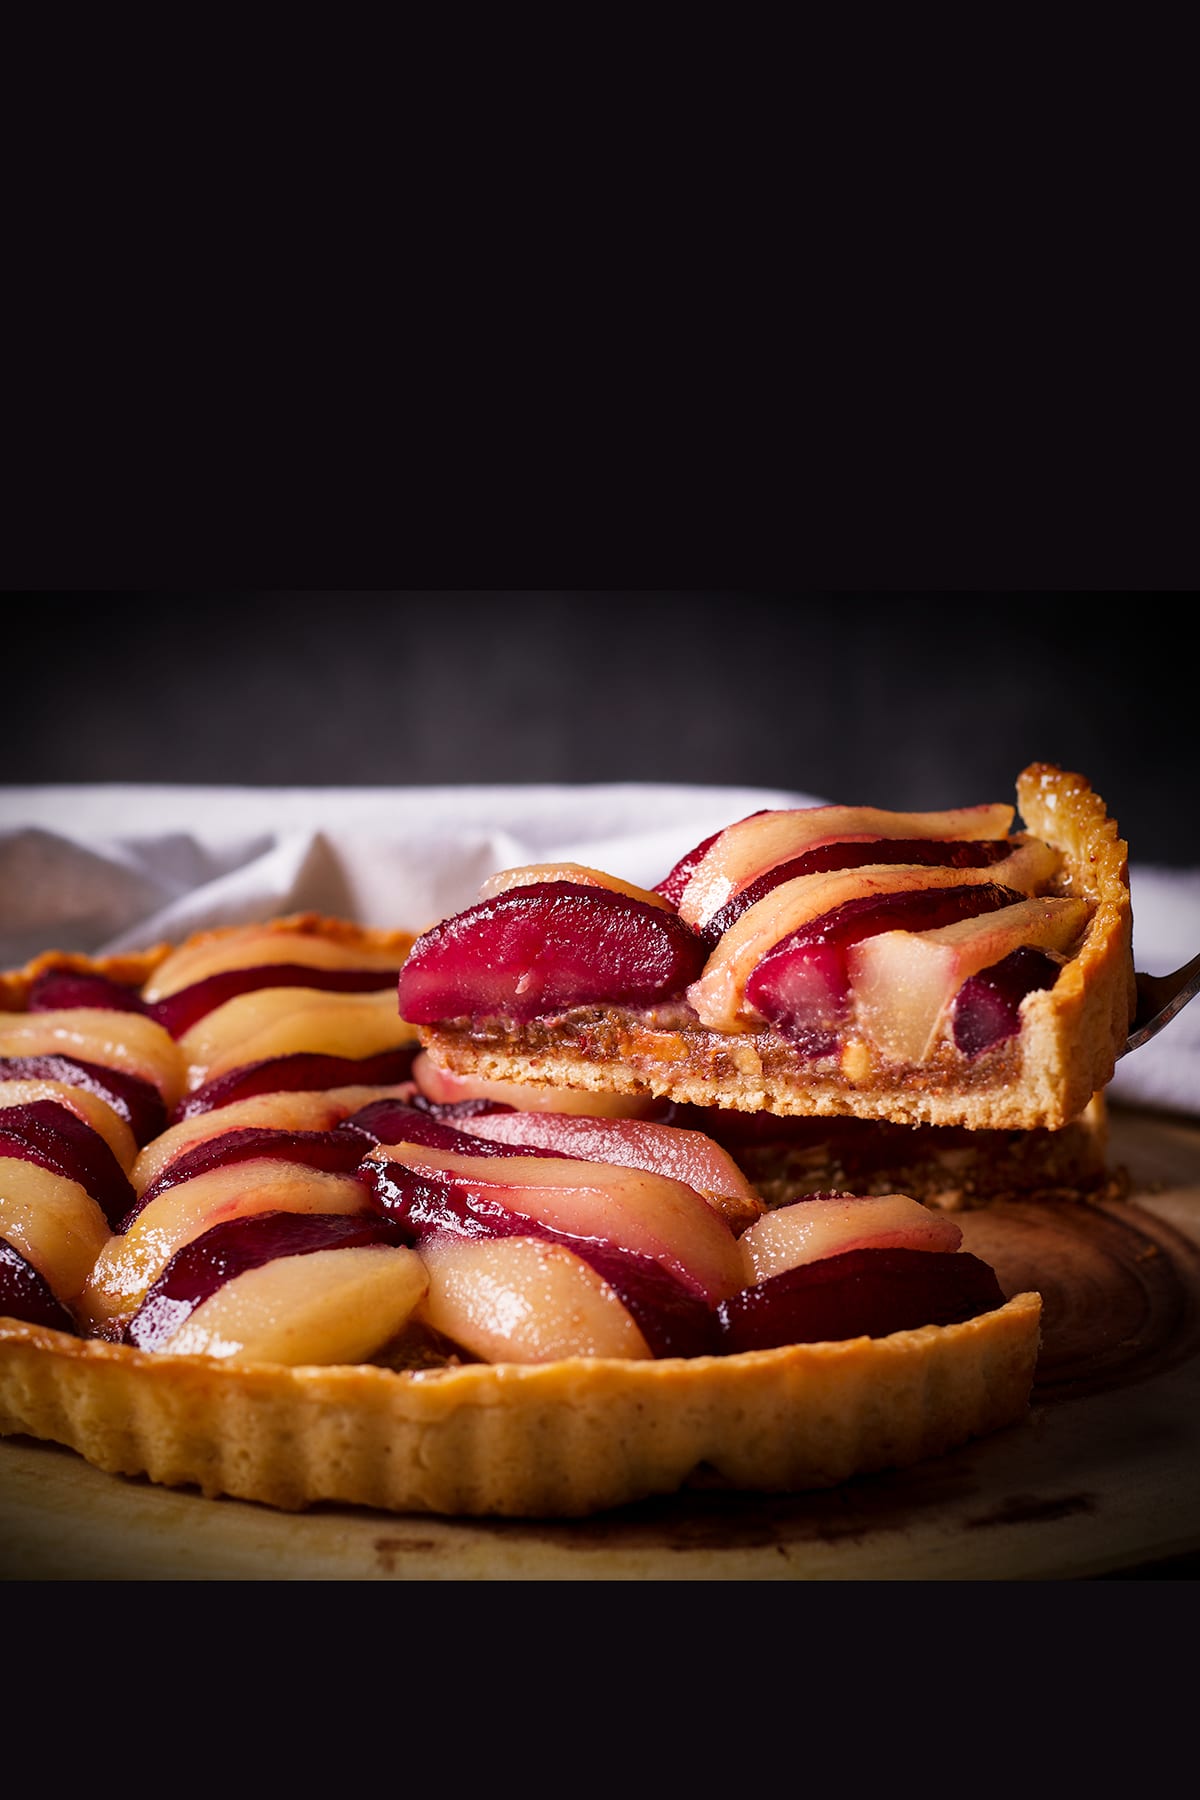
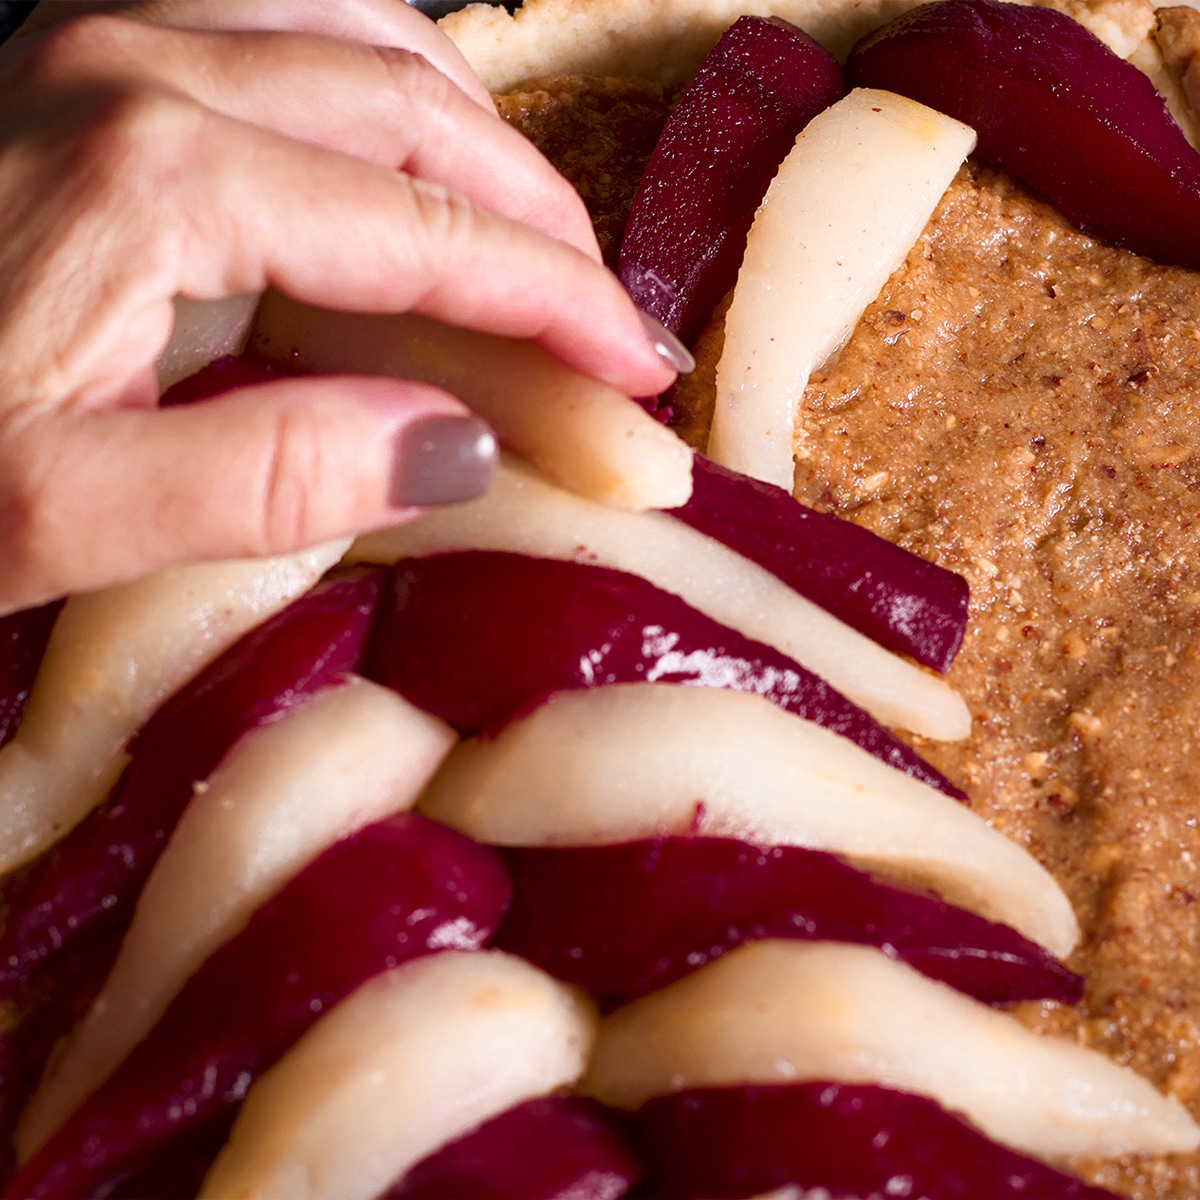
How to Arrange the Pears on this Tart
The fun of having red and white pears is that you can create a pretty design on the top of your tart. As you can see, I decided on a herringbone pattern.
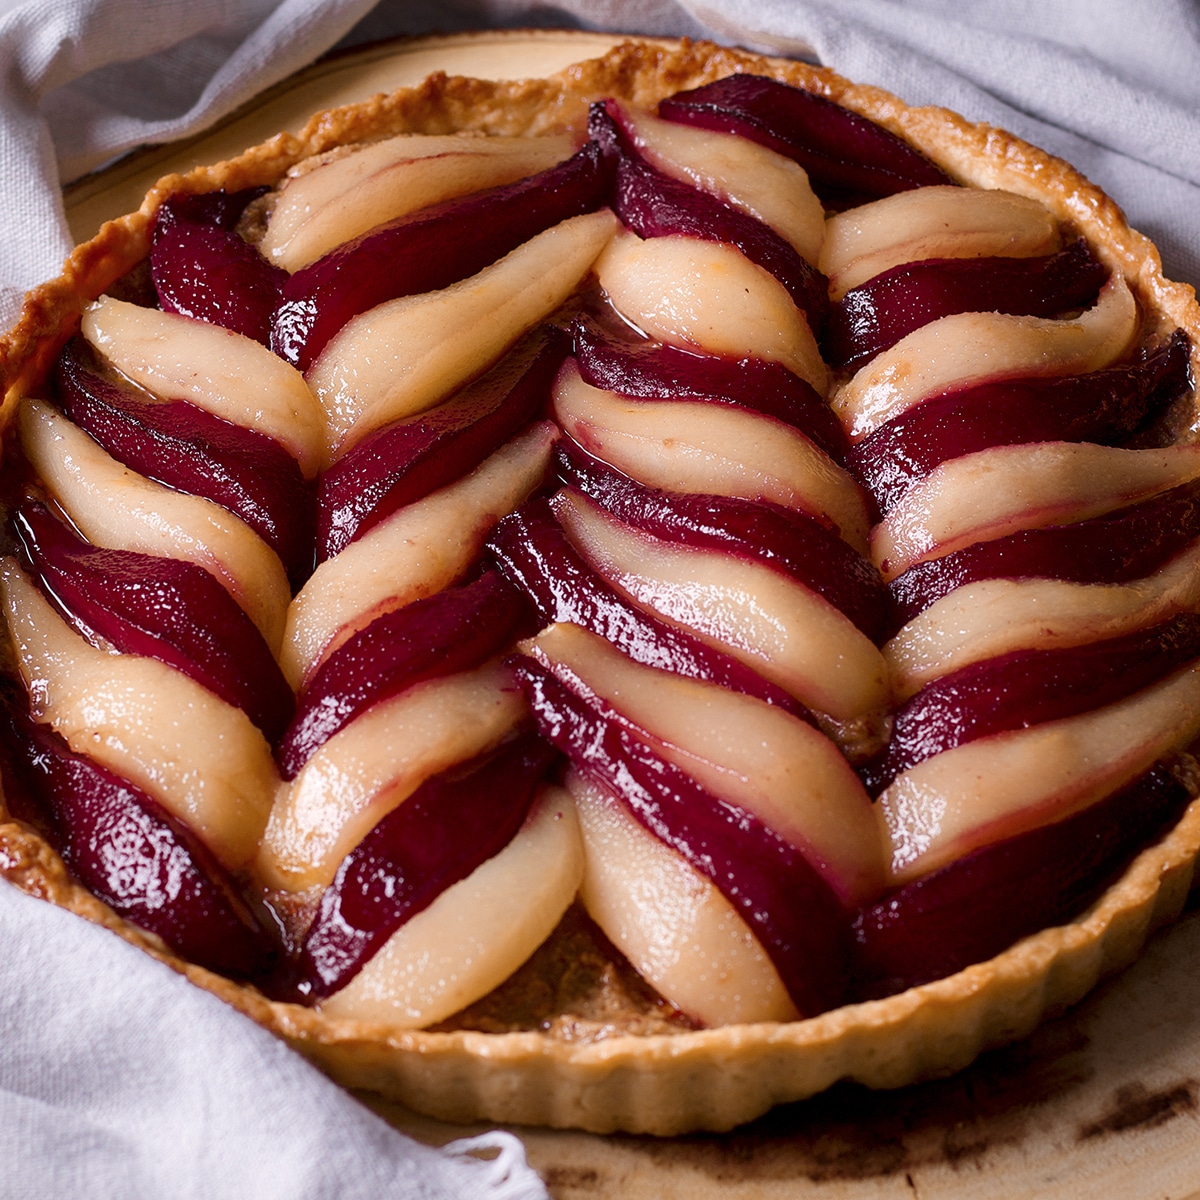
I've also arranged them in a circle that looks a bit like the petals of a flower, which is also lovely. But, I'm sure there are a million different ways you could arrange the pears, so get creative and have fun with it.
To arrange the pears in a pattern similar to what you see here, lay the slices core side down at a 90 degree angle, pressing them down gently into the frangipane and alternating colors. As you build the rows, tuck the ends of the slices underneath the slices in the previous row.
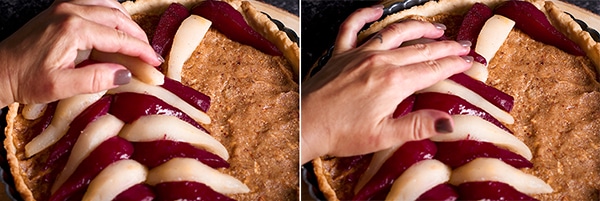
Even after poaching, the pears are surprisingly sturdy, so if the arrangement isn't looking right to you, just lift the pears off the tart and start again.
Make Ahead and Storage Instructions
This tart is best the day it's made, BUT all the components can be made in advance.
- The pastry dough can be made up to 2 days in advance. Store it tightly wrapped in the refrigerator.
- The frangipane can be made up to 3 days in advance. Store it in an airtight container in the refrigerator.
- The poached pears will last a week (maybe even longer) as long as you store them in their poaching liquid in the refrigerator.
With every component pre-made, assembling and baking the tart is a piece of cake. Or, um, a piece of tart.😊

If you give this recipe a try, let me know! Leave a comment, rate it, or take a picture and tag it #ofbatteranddough on Instagram.
Happy baking!
📖 Recipe
Poached Pear Frangipane Tart
Topped with red and white wine-poached pears, this stunning Pear and Frangipane Tart tastes as impressive as it looks.
Ingredients
For the Tart Dough:
- 8 tablespoons (4 ounces/ 113 grams) unsalted butter, cut into ½-inch pieces
- 1 ⅔ cups ((200 grams) all-purpose flour
- ¼ cup (50 grams) granulated sugar
- ¼ teaspoon baking powder
- 1 ½ teaspoons kosher salt - OR, 1 teaspoon table salt
- 6 tablespoons (85 grams) heavy cream
- 3 tablespoons (43 grams) ice water; approximately
For the Wine Poached Pears:
- 6 Bosc pears
- 1 bottle (3 cups) of semi-sweet white wine (I like to use Riesling )
- 1 bottle (3 cups) of dry red wine (I like to use a cabernet or red blend)
- 1 cup (200 grams) granulated sugar, divided
- ½ teaspoon kosher salt, divided - Or, ¼ teaspoon table salt
- 1 orange
- 2 teaspoon pure vanilla extract
For the Frangipane (almond cream):
- 1 ¼ cup (178 grams) dry roasted, unsalted almonds
- 5 tablespoons (62 grams) granulated sugar
- 4 ounces (106 grams) almond paste
- 5 tablespoons (2.5 ounces/ 71 grams) unsalted butter, at room temperature
- 1 large egg plus 1 large egg yolk
- 1 ½ teaspoons kosher salt - OR, 1 teaspoon table salt
- 2 teaspoons pure vanilla extract
- 2 teaspoons almond extract
Instructions
Make the Tart Dough:
- Put the pieces of butter in the freezer for 20 minutes.
- Add the flour, sugar, baking powder and salt to the bowl of a stand mixer fitted with the paddle attachment and mix briefly just to combine.
- Turn the mixer on to low and add the partially frozen butter, a few pieces at a time while it mixes. Once all the butter has been added, turn the mixer to medium-low and mix until there are no pieces of butter larger than a kidney bean. (*Don't over mix! You want visible pieces of butter in there.)
- With the mixer still running, add the cream, mixing on low to combine. Then add only enough ice water to bring the dough together. Be careful to not add too much water - you want only enough to hold the dough together. If you stop the mixer and squeeze some dough between your fingers and it holds together, you've added enough water. If it feels dry and crumbles apart easily, add a bit more water.
- Dump the dough out onto a large piece of plastic wrap and quickly shape it into a disk - work quickly so the heat from your hands doesn't melt the butter in the dough. Wrap the dough tightly and chill in the refrigerator for at least 2 hours and up to 2 days. *The dough can be frozen for up to 2 months.
Make the Wine Poached Pears:
- Pour one bottle of wine in a 3-quart saucepan and the other bottle of wine in another 3 quart saucepan. Add ½ cup of sugar and ¼ teaspoon of salt to each pan and stir to combine.
- Remove the peel from the orange in long strips with a pairing knife and add the peel to the red wine.
- Set both pans over medium-high heat and bring to a boil. Let simmer for 5 minutes while you prepare the pears.
- Peel and core the pears. Slice each pear into quarters, then slice each quarter in half so that you have 8 slices per pear. Add 3 sliced pears to the pan of white wine and 3 sliced pears to the pan of red wine.
- Adjust the heat under each pan to maintain a very gentle simmer. Let the pears simmer for 10 minutes, turning them in the wine every once in a while. After 10 minutes, turn off the heat and let the pears soak in liquid until it is completely cool.
- Remove the pears from the wine, allowing them to drain on paper towels. Set the pan of white wine poaching liquid back over medium high heat and bring to a boil. Cook until the liquid is reduced to about ½ cup. Remove from the heat and stir in vanilla. Let cool. (The white wine reduction will be used to glaze the tart, but you'll nave plenty left over. See note below for how to use the extra.)
Make the Frangipane (Almond Cream):
- Add the almonds and sugar to the bowl of a food processor fitted with the chopping blade. Process until the almonds are roughly ground with no pieces larger than pea size.
- Add the remaining frangipane ingredients and process until the mixture is a homogenous paste. (*Can be made up to 1 week in advance; store in a covered container in the refrigerator. Bring to room temperature before spreading in the tart shell.)
Assemble and Bake the Pear Tart:
- Use a 9-inch tart pan with a removable bottom. (See link below to the one I use.) If you are NOT using a non-stick tart pan, spray the pan lightly with non-stick spray and dust lightly with flour. If you're using a non-stick pan, this is not necessary. If in doubt, it doesn't hurt to spray the pan with a bit of non-stick spray.
- Sprinkle a clean work surface with flour and place the pastry dough, unwrapped, in the center. Sprinkle the top of the dough with more flour and roll the dough out to a disk that's about ¼-centimeter (4mm) thick. As you roll, rotate the dough, sliding a spatula underneath it, to keep it from sticking to your work surface.
- Wrap the dough around your rolling pin to lift into the tart pan. Use your fingers to gently press the pastry into the pan, making sure to get it into the corners. Press the rolling pin across the sides of the pan to cut off excess pastry. Go around the edges of the pan with your fingers to fully mold the pastry into the sides of the pan.
- Cover the pasty with plastic wrap and place in the freezer for 20 minutes. (*If you want a crispy bottom crust, see instructions in the notes below to partially pre-bake the tart shell.)
- Preheat the oven to 425 degrees. F (218 degrees C)
- Remove the pastry from the freezer and scatter golf ball sized pieces of frangipane all over the surface of the dough. Wet your fingers with water and press the frangipane across the bottom of the tart in an even layer.
- Arrange the pear slices over the frangipane in whatever pattern you desire. (Pictures and instructions for arranging them in a herringbone stripe are above.)
- Bake the tart at 425 degrees. F (218 degrees C) for 20 minutes.
- Reduce the heat to 400 degrees F (204 degrees C) and bake for 15 minutes.
- Reduce the heat to 350 degrees F (176 degrees C) and bake for 20 minutes.
- Remove the tart from the oven and let cool completely on a wire rack. Carefully remove the side of the tart pan. Use a pastry brush or clean paint brush to coat the pears with a layer or two of white wine glaze and serve.
Notes
*This tart is best the day it's made, although all the individual components - pastry, frangipane, and poached pears can be made in advance.
- To poach the pears, you'll need two different saucepans that should be at least 3 quarts or larger. If you only have one saucepan to work with, just make the pears in successive batches. This will increase the overall length of time it takes to make the pears, but not increase the hands-on time at all. Do not use aluminum pans because aluminum is highly reactive with acidic foods, like wine.
- If you're making the poached pears in advance, store them in their cooking liquid in a covered container in the refrigerator.
- Keep the pear poaching liquid! This stuff is liquid gold. After removing the pears from the poaching liquid, let it boil on the stovetop until reduced to about ½ cup. Store in the refrigerator and pour over ice cream, cake, or anything your heart desires. Soooooo good! My favorite way to eat it is drizzled over ice cream stuffed profiteroles.
- For a crispy bottom crust, partially pre-bake the pastry shell: Heat the oven to 400 degrees. Line the pastry with aluminum foil and then fill the center with dried beans or pie weights. Bake for 17 minutes. Remove the beans and foil, poke holes across the surface of the dough with a fork, and bake for an additional 10 minutes. Let cool completely before filling and baking the tart. Fill the tart with frangipane and pears as instructed then bake as follows: Bake for 10 minutes at 400 degrees. Reduce the heat to 350 and bake for an additional 30 minutes.
Recommended Products
As an Amazon Associate and member of other affiliate programs, I earn from qualifying purchases.


Nutrition Information:
Yield: 8 Serving Size: 1Amount Per Serving: Calories: 775Total Fat: 39gSaturated Fat: 16gTrans Fat: 0gUnsaturated Fat: 21gCholesterol: 86mgSodium: 1054mgCarbohydrates: 89gFiber: 7gSugar: 57gProtein: 10g
SHANIKA says
Wow! This Tart looks absolutely perfect! I love the bold flavor of the wine poached pears and frangipane! Definitely perfect for the Holidays!