This easy Apple Butter recipe lets the slow cooker do all the work, requiring very little hands-on time, while producing a rich, thick, cinnamon and spice fruit spread suitable for canning.
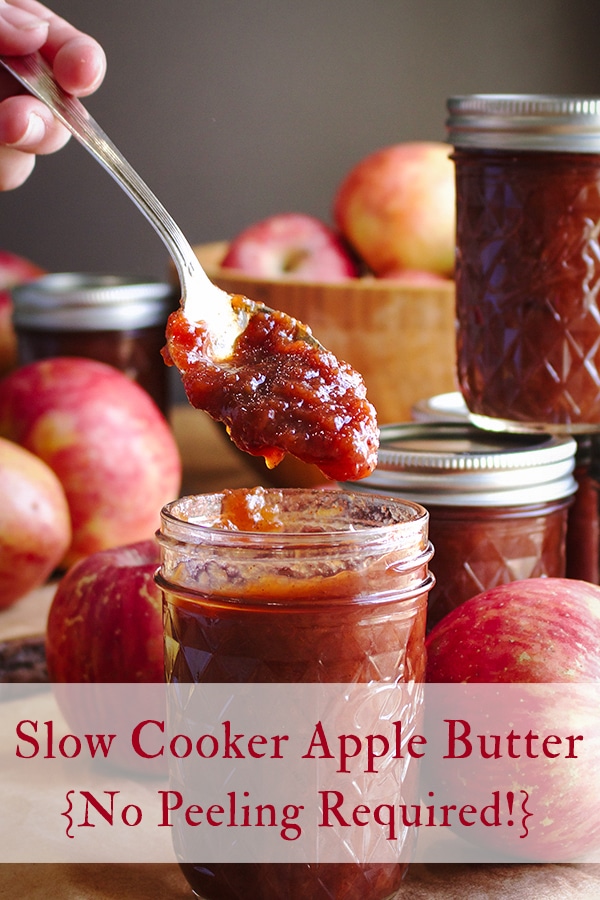
Contrary to what the name suggests, Apple Butter contains no actual butter. But it's so rich and creamy that the name fits. It's made by simply cooking apples over low heat for a really long time, until they are condensed into a thick fruit spread.
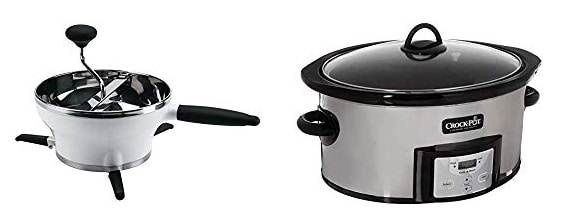
Because of the long cooking time, using a slow cooker is the way to go. And, a simple food mill allows you to take advantage of the natural pectin and flavor contained in the apple peel and core while saving you the hassle of peeling and coring all those apples. 🙌
My food mill is one of the simplest, yet most useful things in my kitchen. Part strainer and part masher, food mills force food through perforated disk that mashes the food while separating out skin, core and seeds. It's indispensable in the summer months, when tomatoes are in season and I find myself making batch after batch of roasted tomato sauce.
And, if you use one to make apple butter, you don't need to peel or core your apples. Let me just say that again...
This Apple Butter Recipe does not require you to core or peel your apples.
This is great for two reasons: Peeling and coring apples is a tedious, time consuming task, and you get to take full advantage of the natural pectin, vitamins, and flavor in the apple peel and core.
Start by cooking apples in apple cider and apple cider vinegar for about 20 minutes, then letting them sit in the liquid at room temperature for 6-8 hours. This method allows you to extract as much flavor as possible from the apple core and peel before pushing them through a food mill to separate core and peel from the apples.
After that, it's just a matter of adding some sugar and spices and letting them simmer away in the slow cooker until the mixture is thick and rich and delicious. So, while the actual length of time, start to finish, to make apple butter is nearly 24 hours, the hands on time is only about 30 minutes.
I like to get the apples simmering in the apple cider and cider vinegar in the evening, covering the pan and letting them soak in the liquid overnight. In the morning, I push the apples through the food mill, letting them simmer away in the slow cooker for the rest of the day.
Warning: this will make your whole house smell like caramel apple pie.
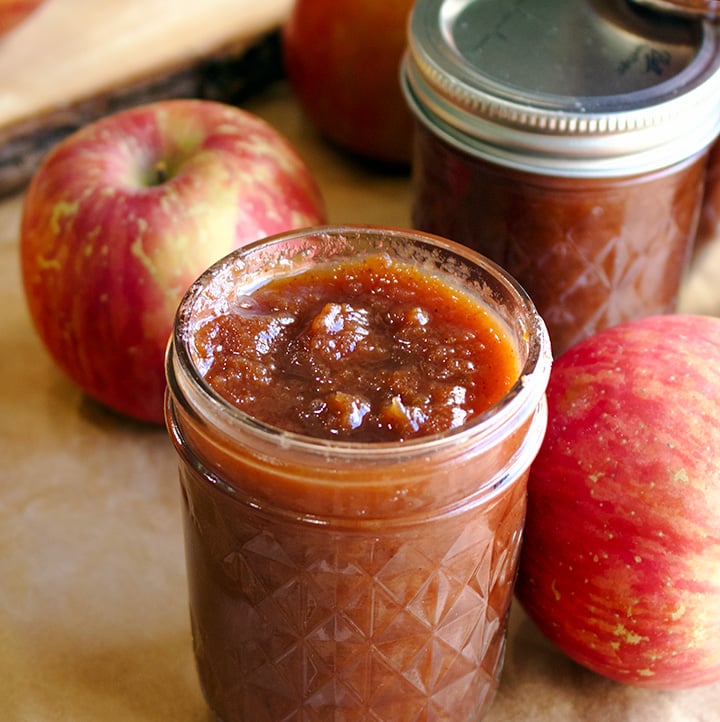
Storing and Preserving Apple Butter
Apple Butter will keep in the refrigerator for about one month and in the freezer for up to 6 months. If you process jars of apple butter in a water bath, they will keep almost indefinitely.
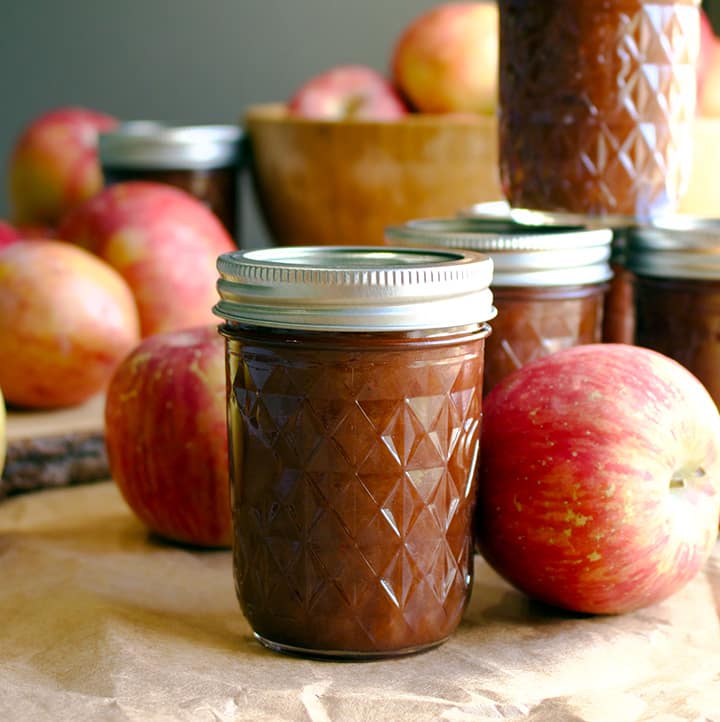
Canning apple butter is suuuuuper easy. Just scoop it into very clean, dry glass jars leaving about ¼ inch at the top. Using a damp cloth or paper towel, wipe the tops of the jar to ensure a clean seal. Cap and screw on lids, leaving them a teensy bit loose.
Bring a large pot of water, or water-bath canner, to a rolling boil and gently lower the jars into the boiling water using tongs. The water should cover the jars by at least ½ inch. Let process for 10 minutes. Remove the jars from the water bath and place upside down on a dry towel laid out on a flat surface.
Once the jars are cool, check the seal by gently pressing down on the center of the lid. If it pops up and down (often making a popping sound), it is not sealed. If that should happen to a jar or two, just store the preserves in the refrigerator and use it within 3 weeks.
Here's what to do with all that delicious apple butter...
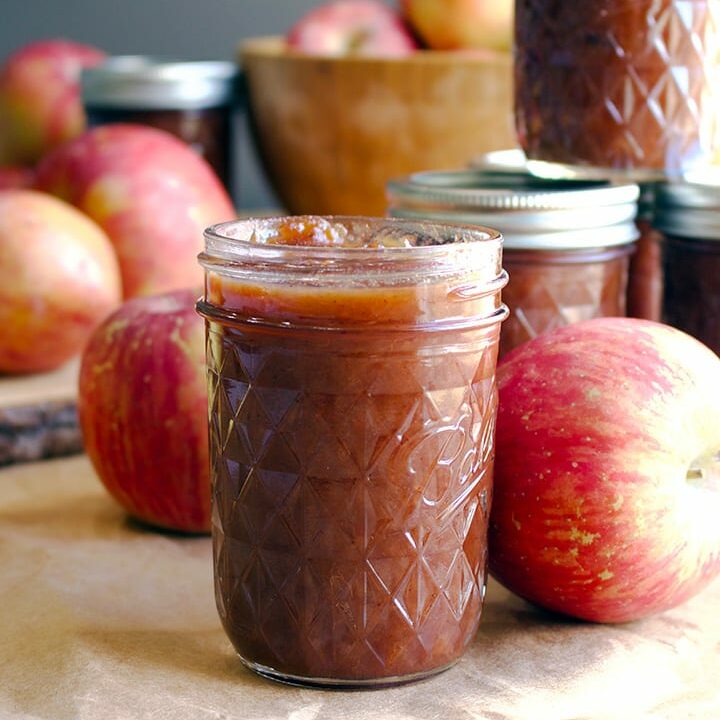
This recipe will give you enough for six or seven 8-oz jars. When apples are in season, I usually make several batches, preserving the jars in a water bath so I can store them in my cupboards. Apple Butter makes a great gift and is a delicious treat to have on hand in the dead of winter, when good fresh fruit is hard to come by.
Spread apple butter on anything you'd also spread jam on - toast, English muffins, bagels, croissants, and my favorite, Simple Cream Biscuits.

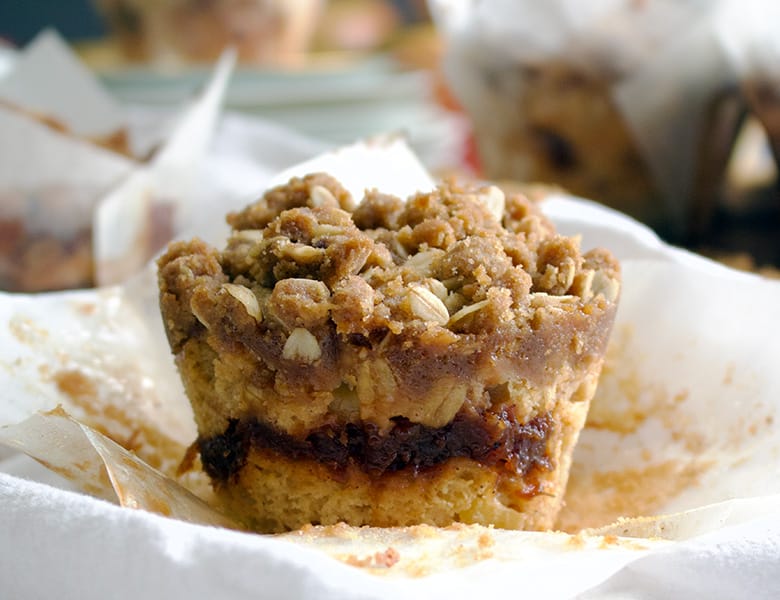
OR, make a batch of Apple Cinnamon Muffins with Brown Sugar Streusel and a gooey Apple Butter center. These yummy muffins are packed with a ton of fresh apple chunks and flavored with cinnamon, nutmeg, almond and vanilla. Their centers contain a delicious scoop of apple butter before being topped off with hunks of buttery brown sugar streusel.
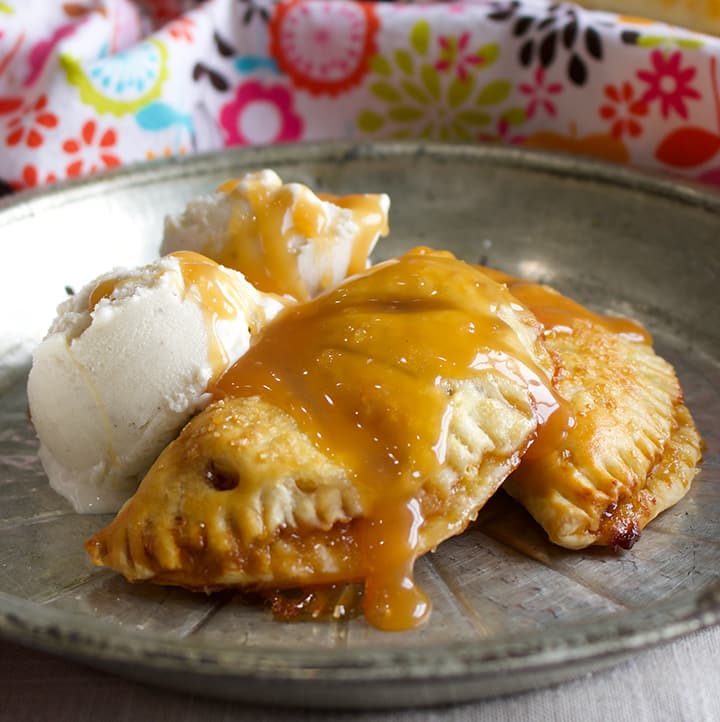
OR, how about a batch of flaky Apple Butter and Pastry Cream Hand Pies? These buttery little hand pies are filled with almond pastry cream and apple butter. They are flaky, creamy, & packed with warm apple flavor.
These little apple butter hand pies are the perfect little sweet treat because they are not too sweet and make a delicious on-the-go hand-held breakfast, lunchbox treat, afternoon snack. But, my favorite way to eat them is with scoops of vanilla ice cream and a drizzle of caramel sauce.
Used in this Apple Butter recipe:
As an Amazon Associate I earn from qualifying purchases.
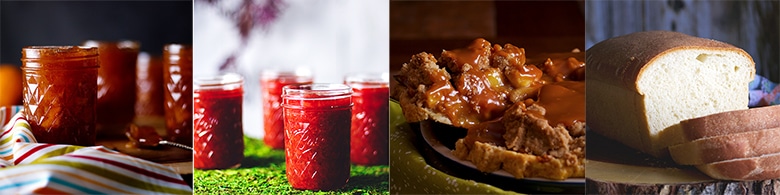
Other Recipes You Might Like:
Apple Butter is a Building Block Recipe
Building block recipes are tried-and-true recipes that I consider foundational to great home baking. They are the kind of recipes I come back to over and over again, sometimes baking them as is, but often using them as a jumping off point to create something new. > Scroll through all Building Block recipes.
📖 Recipe
No Peel Slow Cooker Apple Butter
This easy Apple Butter recipe lets the slow cooker do all the work with minimal hands-on time. Rich, buttery, & packed with spiced apple flavor.
Ingredients
- 6 lbs of apples, cut into quarters without coring or peeling
- ½ cup apple cider vinegar
- 2 cups apple cider
- ½ cup fresh squeezed lemon juice
- 1 ¼ cups dark brown sugar
- ½ cup granulated sugar
- 3 teaspoon ground cinnamon
- 1 teaspoon ground nutmeg
- 1 teaspoon ground ginger
- ½ teaspoon ground cloves
- ½ teaspoon ground allspice
- 1 teaspoon salt
- 2 teaspoon pure vanilla extract
Instructions
- Add the quartered apples, apple cider vinegar, apple cider, and lemon juice to a large saucepan and set it over medium-high heat. Bring the mixture to a boil, stirring frequently. Cover the pan, turn the heat to medium-low, and simmer for 20 minutes, stirring occasionally. The apple should be "crisp-tender"; if you poke a fork into one of the slices, it should slide in but with some resistance. If the apples have not reached this point, allow them to cook a bit longer. Remove the pan from the heat, keep covered, and let sit at room temperature for 6-8 hours.
- Set a food mill that's fitted with the largest straining plate over the bowl of your slow cooker. Push the apples and all the liquid in the saucepan through the food mill into the slow cooker bowl, which will separate the apples from the core and peel. Add all the remaining ingredients, except the vanilla, to the apple pulp and stir to mix.
- Cook the mixture on high for 8 hours, stirring every once in a while. Remove the lid and cook for an additional 3-4 hours on high, until the apple butter is thick and deep brown. (*See notes about temperature below.) To test that it's done, place a small dish in the freezer for a few minutes. Spoon a bit of the apple butter onto the frozen dish and let sit for about 5 minutes. This will cool the apple butter quickly, allowing you to test it's thickness.
- Stir in the vanilla.
- Store apple butter in the refrigerator for up to 1 month, in the freezer for up to 6 months.
To preserve apple butter, spoon into sterilized jars and process in a hot water bath for 10 minutes.
- Pour the hot mixture into very clean, dry glass jars leaving about ¼ inch at the top. Using a damp cloth or paper towel, wipe the tops of the jar to ensure a clean seal. Cap and screw on lids, leaving them a bit loose.
- Bring a large pot of water, or water-bath canner, to a rolling boil and gently lower the jars into the boiling water using tongs. The water should cover the jars by at least ½ inch. Let process for 10 minutes. Remove the jars from the water bath and place upside down on a dry towel laid out on a flat surface. Allow to cool completely.
- Once the jars are cool, check the seal by gently pressing down on the center of the lid. If it pops up and down (often making a popping sound), it is not sealed. If that should happen to a jar or two, just store the preserves in the refrigerator and use it within 3 weeks. Properly sealed jars can be stored in the cupboard for up to 12 months.
Notes
- I like to get the apples simmering in the apple cider and cider vinegar in the evening, then cover the pan and let them soak in the liquid overnight. In the morning, push the apples through the food mill, and let them simmer away in the slow cooker for the rest of the day. You can also soak the apples in apple cider and vinegar early in the day, let them sit in the liquid through the middle of the day, and then let them simmer in the slow cooker overnight.
- Different slow cookers can cook food at different temperatures. If you feel that cooking your apple butter on high for such a long time is causing the bottom of the apple butter to burn, simply turn the heat down to low.
Nutrition Information:
Amount Per Serving: Calories: 0Total Fat: 0gSaturated Fat: 0gTrans Fat: 0gUnsaturated Fat: 0gCholesterol: 0mgSodium: 0mgCarbohydrates: 0gFiber: 0gSugar: 0gProtein: 0g
© Of Batter and Dough. All images & content are copyright protected. Please do not use my images without prior permission. If you want to republish this recipe, please re-write the recipe in your own words, or link back to this post for the recipe. Some of the links above are affiliate links, which pay me a small commission for my referral at no extra cost to you! Thank you for supporting Of Batter and Dough.


Pat says
Rebecca,
Could you describe how tender the apple quarters should be when you quit the initial cook? I followed the recipe (medium-high until boiling, turned down to medium-low for 20 minutes and I listened to assure my pot was simmering.) The apples were still quite firm, but I did as directed, put the lid on and removed from the burner. When morning came, the apples were still too firm to process in my foodmill. I've returned them to the stove to cook until they are a bit tender. I couldn't bear the thought of throwing them out and starting over!
So, I assume that I needed to cook them longer to some specific softness rather than "20 minutes". I do live at 6,400 feet.
Thanks for your help.
Rebecca Blackwell says
Hi Pat! So glad you didn't throw them out! Cooking them for longer should do the trick - did that work for you? Every time I've made this recipe the apples have been soft enough to put through the food mill after letting them rest for 6-8 hours, so this is an interesting problem. It's possible altitude has something to do with it. The first several times I made this I was at 5200 feet, so it didn't occur to me that altitude might be a problem for some people, but at 6400 feet, that might make more of a difference. I'm thinking about how to add a note to the recipe to address the issue ... I think the best way to check the softness of the apples before removing them from the heat is to see if they are fork tender, but not even approaching mushy. You should be able to poke a fork into an apple and have it slide in, but there will be resistance and you will be able to tell that the apple is still crisp. Maybe "crisp-tender" is the way to describe it.
Does that help?
Pauline Wardle says
What type of apples can be used?
Rebecca Blackwell says
Hi Pauline! You can use pretty much any kind of apples to make apple butter, but apples that are on the sweet side tend to work best. I generally like to use Braeburn or Fuji. And, even though Granny Smith are great for baking, I wouldn't use them for apple butter because they are so sour. The most important thing is that the apples themselves taste good. Making apple butter concentrates the flavor of the apples, so it's important to start with delicious apples. I hope that helps! Please let me know if you have any other questions. And, I'd love to know what you think of this recipe after you make it! xo
Sharleen says
Hi Rebecca,
Thank you for getting back to me about the crockpot temperature. I found that after an hour on high, I had to turn it to low. Cooked it on low for rest of the time, then took the lid off and did the 4 hours on high. I have 9 half pints in the water bath now for 10 minutes. My apple butter looks just like yours!! I think your apple butter recipe is delicious. Can’t wait to have it on toast. Thank you for your recipe.
Rebecca Blackwell says
I'm so happy to hear this Sharleen! Thank you so much for getting back to me with an update! I haven't made any yet this year (I will soon!), so I wish I could somehow crawl through the screen and have some with you. 🙂
Sharleen says
I am in the process of making your recipe however, cooking this on high for 8 hours is a little too much. I think it should say cook on low for 8 hours. Is this correct or do I have it wrong?
Rebecca Blackwell says
Hi Sharleen! The recipe is correct - cook the apple butter on high. However, pay attention because there can be a difference in how different slow cookers heat food. The other thing that can be a factor is how much liquid is in the apples. More liquid needs higher heat for longer to allow the excess water to evaporate. Dryer apples will not need as long. If you feel that the bottom of the apple butter is scorching, turn the heat down to low. Please let me know if you have any other questions! And, I'd love to hear how your apple butter comes out! xo
Melinda Wilcox says
This is almost exactly how I make applesauce, complete with the cider added. I remove the black blossom end bits (opposite the core end) because I wonder if they are too small to be caught in the food mill. What is your experience? Thanks so much for a clever recipe!
Rebecca Blackwell says
Hi Melinda! I think it really just depends on your food mill and how large the holes in the plate are. It sounds like you know what works for your mill, so I'd suggest sticking to it for this recipe as well. I've never used my food mill to make applesauce, and after reading your comment, I'm wondering why that's never occurred to me. I'm totally going to have to try that next time! Thank you so much for taking the time to leave a comment for me! xo
Roy says
Hi, can you please give instructions to the ones that don't have a slow cooker?
Rebecca Blackwell says
Hi Roy! Thanks for reaching out. The temperature of a slow cooker set to high is about 300 degrees, so you could just follow the same process, placing the apple butter in a heavy bottomed pot in your oven, setting it to 300 degrees. Cover the pot for the first 8 hours, stirring it every hour or so, then cook it for a couple of hours uncovered to reduce it to a thick apple butter. It's possible that the apple butter will cook a bit more quickly in the oven, so just pay attention to how it looks as it cooks. If it's ready sooner, all the better. Please let me know if you have any other questions! And, I'd love to know what you think of this apple butter once you make it. xo
Debbie says
It doesn’t say when to add the vanilla
Rebecca Blackwell says
Hi Debbie! Sorry about that. I've remedied this oversight in the recipe. Add the vanilla at the very end, once the apple butter has finished cooking and is at the right consistency. Thanks for the catch! I'd love to hear what you think of this recipe! xo
Melita says
Hi Rebecca,
I'd love to give this a try it sounds divine, Here in the UK the weather is changing and fall is well and truly here. This would be perfect for using up apples, So comforting and delicious!! I don't have a food mill so should I just peel and core the apples and skip that step or do you know of a better way? I am fairly new to your site but your recipies are lovely and very inspiring. Thank you
Melita
Rebecca Blackwell says
Hi Melita! Yes - if you don't have a food mill, just peel and core the apples, a bit of a time consuming process, but soooo worth it. Please let me know if you have any other questions! And, if you make this, will you let me know how you like it? You're going to love how the cooking apple butter makes your house smell.... 🙂 xo
Lea Ann (Cooking On The Ranch) says
Hi, I’d love to give this recipe a try, but I can’t figure out the logistics. This is a 20 hour project. Too long to start even inthe wee hours of the monring and finish in that day. I’m curious - how to you do this?
Rebecca Blackwell says
Hi Lea Ann! In the post, I talk about how I like to get the apples simmering in the apple cider and cider vinegar in the evening, covering the pan and letting them soak in the liquid overnight. Then, in the morning, I push the apples through the food mill, and let them simmer away in the slow cooker for the rest of the day. I realized from you comment that it would be easy to miss that logistical suggestion, so I added it as a note in the recipe as well. Thanks so much for asking! If you do make this, will you let me know how you like it? xo
Lea Ann (Cooking On The Ranch) says
Thank you so much. That's what I get for skimming verbiage. I so much appreciate your reply. Will start this tonight. What a great recipe. Don't have a food mill, but do have an old time food sieve that's used for jams/jellies.